Graphics Programs Reference
In-Depth Information
In Quick Mask mode, Photoshop automatically defaults to Grayscale mode, with a
foreground color of black and a background color of white. When using a painting
or editing tool in Quick Mask mode, keep these principles in mind:
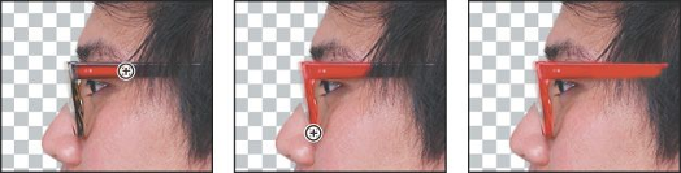
• Painting with black adds to the mask (the red overlay) and decreases the
selected area.
• Painting with white erases the mask (the red overlay) and increases the
selected area.
• Painting with gray partially adds to the mask.
8.
Click the Edit In Standard Mode button to exit Quick Mask Mode.
The unmasked area is selected. Unless you save a quick mask as a more permanent
alpha-channel mask, Photoshop discards the temporary mask once it is converted
to a selection.
9.
Choose Select > Inverse to select the area you originally masked.
10.
Choose Image > Adjustments > Hue/Saturation.
11.
In the Hue/Saturation dialog box, change the Hue to
70
. The new green
color fills the glasses frame. Click OK.