Hardware Reference
In-Depth Information
The RGB LEDs on the strip are controlled by a chip that latches data from the microcontroller/
Raspberry Pi onto the LEDs with reference to the clock cycles received on the clock pin.
In the case of the LPD8806 strip, each chip can control about 2 LEDs. It can control each
channel of the RGB LED using a seven-bit PWM channel. More informaion on the funcion of
It is possible to break the LED strip into individual segments. Each segment contains about
2 LEDs, and Adafruit industries has provided an excellent tutorial to separate the individual
segments of the LED strip (
https://learn.adafruit.com/digital-led-strip/
Lighting up the RGB LED strip
There are two ways of connecing the RGB LED strip. They can either be connected to an
Arduino and controlled by the Raspberry Pi or controlled by the Raspberry Pi directly.
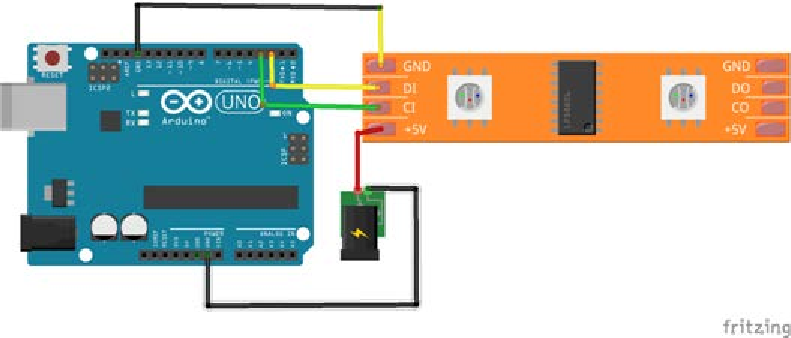
An Arduino-based control
It is assumed that you are familiar with programming microcontrollers,
especially those on the Arduino plaform.
In
Project 3
,
The
Arduino Raspberry Pi Interface
, we discussed connecing an analog RGB strip
using an Arduino. We used control commands to change the color of the strip through the
serial port of Arduino. Similarly, we can connect the RGB strip to the Arduino.
An Arduino connection to the digitally addressable interface