Graphics Programs Reference
In-Depth Information
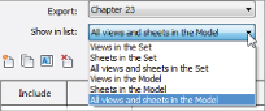
clicking the New Set icon. Once you give the set a name, all the printable
views and sheets appear in the list. The drop-down at the top of the right
side, shown in
Figure 23.32
,
enables you to filter the list for specific types of
views or sheets.
Figure 23.32
Export filter list
You can use the check boxes in the Include column of the list to determine
which sheets or views will be exported. Once the list is established, you can
click the Save Set & Close button so that the next time you access the dialog
box, it returns to the saved settings.
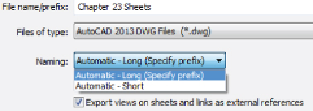
Once you have established the settings for export, clicking the Next button
allows you to browse to the location for the exported CAD file(s). The check
box at the bottom of the window creates separate DWG files for each view
that is on a sheet when you're exporting Revit sheets. You can specify a
prefix to the names of the files and also the file type, as shown in
Figure
Figure23.33
Export file naming options
The option to export sheets or views to DWF works in the same way as
exporting to CAD, except additional options are available because of the
capabilities of a DWF file to report element properties. In the DWF Export
Settings dialog box, the DWF Properties tab allows you to export the
properties of your Revit model elements and to access print settings prior
to export. The Project Information tab gives you direct access to the project
information contained in your Revit project. You can edit the parameters in
this dialog box to update any project information, such as issue date, prior
to export.