Graphics Programs Reference
In-Depth Information
Organizing Details on a Drafting View
You can limit the number of drafting views required in your project by
grouping details that will appear on the same sheet into drafting views.
However, it may require some planning of sheet layouts prior to sheet
creation. It also means you cannot use reference bubbles for individual
detail titles, so this should be done only for sheets showing typical
details that are not referenced in the model views or where details are
referenced by their title.
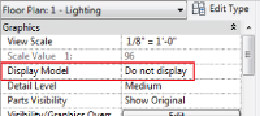
Figure 22.24
Display Model parameter setting
When the detail is placed into your drafting view, it is just as if you drew
the detail manually in the view. You can edit the lines and text if necessary
to modify the detail for your specific project. If you change the detail
significantly enough that you want to keep it as a new detail, you can copy
and paste it into a new drafting view in the detail file where it came from.
Inserting Views
The Insert Views From File option loads selected views from a chosen file.
You should use this method if you want to have the drafting view in your
project. Choosing this option brings up a dialog box where you can browse
to the file containing the view you want to load. This does not have to be a
filelocatedinyourdetaillibrary.Forexample,ifyouknowofadraftingview
in another project that has details on it that you want for your project, you
can browse to that project file and choose the drafting view from it.
The Insert Views dialog box that appears when you open a file shows any
views available for loading into your project. You can select multiple views,
including drafting views, schedules, and reports to be added to your project.
You can also insert entire sheets of details by selecting a sheet from the list
instead. Revit will create the sheet, load all the drafting views, and put them