Graphics Programs Reference
In-Depth Information
Figure 22.15
Line Style ribbon panel
9. Place your cursor over the circle called out as the SPRINKLER
BRANCH LINE in the detail. With the circle highlighted, click to place a
Revit line.
10. Place your cursor over the vertical line at the top-left side of the circle.
Press the Tab key to highlight all three lines at the top of the circle, and
then click to draw Revit lines; see
Figure 22.16
.
Figure 22.16
Tab selection of multiple lines using the Pick Lines tool
11. Continue placing lines by clicking the CAD detail lines, using the Tab
key when applicable, until you have completely duplicated the detail
linework, including the detail title text line. Do not use the padlock icon
to lock the Revit lines to the CAD detail.
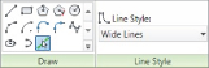
12. Click the Region button on the Annotate tab and select Filled Region.
Select the Pick Lines tool from the Draw panel, and set the line style to
Thin Lines in the Line Style panel.
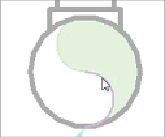
13. Place your cursor over the lower arc inside the circle that is called out as
SPRINKLER BRANCH LINE in order to highlight the line, as shown in
Figure 22.17
Arc selection
14. Press the Tab key twice to highlight the connected linework, and click to
draw the region border. (Be careful not to move the cursor off the line