Graphics Programs Reference
In-Depth Information
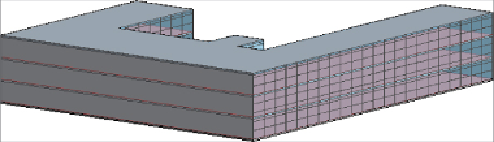
Figure17.49
Creating curtain walls
14. Repeat step 12, this time selecting the Curtain System option from the
Model By Face panel. You have the option to pick several faces of the
mass at the same time, just as for the floors. Do not be tempted to do
this, because the result will be
one
curtain wall, covering several faces. If
the mass changes substantially, you may have to delete the walls and
start again.
15. Large window openings can be created by using curtain walls in
conjunction with the Cut Geometry tool. This hosts the curtain wall
within a host wall, effectively creating windows without having to resort
to window families, which could take more time and effort. From the
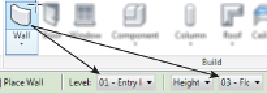
Architect tab, select the Wall tool.
Figure 17.50
shows that in this
instance, the Options Bar indicates the Level and Height settings of the
wall you are going to create.
Figure 17.50
Options Bar
16. Select the wall type Curtain Wall: Exterior Glazing. Set the start level to
Level 1 and the height to Level 3, and draw a curtain wall, as shown in
Figure 17.51
. Note the message stating that the highlighted walls are
overlapping.