Graphics Programs Reference
In-Depth Information
Figure 17.42
The Create Form button
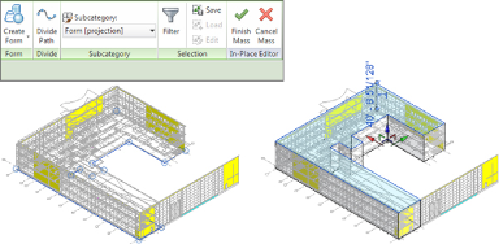
5. If the Mass object is higher than you intended, as indicated in
Figure
height. If you change the 3D view to Front, you will see that as you
stretch the mass, it snaps to other objects.
Figure 17.43
Stretching the Mass object
6. Click the Finish Mass button (which has a green check mark).
7. For clarity, the linked file can now be turned off in the 3D view. Select
the Mass object, and from the Modify tab, select the Mass Floors button.
In the dialog box that opens, place a check mark next to the levels in
which you want to create a Mass floor, as shown in
Figure 17.44
.