Graphics Programs Reference
In-Depth Information
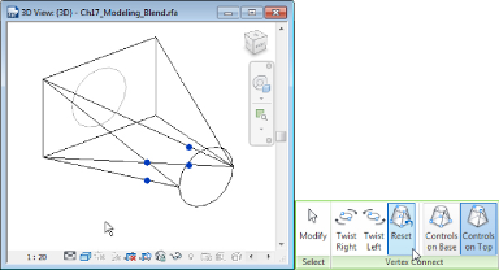
Figure 17.4
Vertex editing grips
Once you have finished editing the vertices of a blend, you must click the
Modify button on the Edit Vertices tab to return to the sketch mode tab.
As always, you must then click the green check mark button to exit sketch
mode. The file
Ch17_Modeling_Blend.rfa
is provided as an example
and can be found at
www.sybex.com/go/masteringrevitmep2015
.
Revolves
A
revolve
is a profile that spins around a specified axis. Using the Revolve
tool allows you to create spherical solid geometry. You can start creating a
revolvebyclickingtheRevolvebuttonontheHometabintheFamilyEditor.
You can begin either by sketching the shape of the revolve or by selecting or
creating the axis of rotation around which the shape will revolve. However,
the profile must not cross over the axis. If it does, Revit will provide a
warning indicating that it cannot make the form when the Finish Edit Mode
button is selected.
The axis of rotation will always be perpendicular to the shape that you
create, so it helps to first determine the orientation within the family of the
shapeyouarecreating.Oncethathasbeendetermined,youwillknowwhere
the axis needs to be and can switch to the appropriate view. For example, if
you wanted to create a hemispherical solid that would lie flat when placed
into a plan view, you would draw the axis perpendicular to the plan view.
Switching to an elevation view in the Family Editor would allow you to
draw the axis perpendicular to the plan. To do this, first define or select
a workplane to host the axis line; this ensures that the profile is oriented
correctly.