Graphics Programs Reference
In-Depth Information
specific objects in your project model, and to display any warnings
associated with your project. Along with the settings that can be
accessed from the tools on the Settings panel, the Additional Settings
button is a drop-down list of even more options. The MEP Settings
button is located on the Settings panel. This is where you can establish
settings related to MEP components and system behavior. The Selection
panel, as indicated in
Figure 1.14
, has tools that allow the user to save,
load, and edit a selection set of objects for use in a filter list.
Figure 1.14
The Manage tab
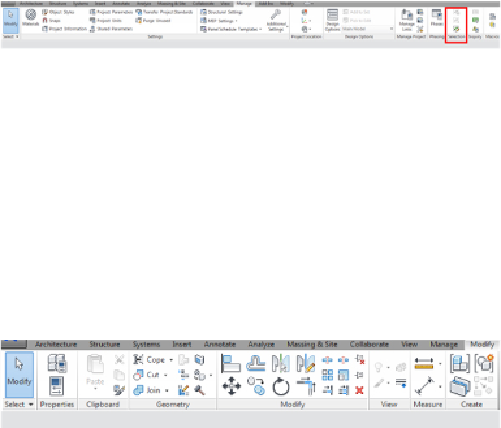
Modify
The Modify tab, as shown in
Figure 1.15
,
is located at the end of
the tabs by default so that it is closer to the center of the user interface,
for easy access. The Modify tab has the tools needed to make changes to
components or linework in your project views. The tools on the Modify
panel have been arranged with the more commonly used tools that have
larger buttons. Some of the tools that have multiple-use options have a
separate button for each use, such as the Mirror, Split, and Trim/
Extend tools. The tools for creating groups, assemblies, or parts are
located on the Create panel.
Figure 1.15
The Modify tab
Add-Ins
The Add-Ins tab appears on your ribbon as the next-to-last
tab by default. This tab contains a BIM 360 panel with tools for use in
the Autodesk
®
360 environment and requires you to sign into an
Autodesk account. If you have installed any external applications, the
buttons or other features provided appear on the tab as configured.
Some third-party applications create an additional tab on the ribbon.
The Modify button appears in the Select panel on every tab. This button
allows you to exit from any active command, giving you an alternative to
using the Esc key multiple times or selecting another tool. Another feature
of this panel is the drop-down that contains options for selection in the