Graphics Programs Reference
In-Depth Information
the switch system. Click the Select Switch button, and select the desired
switch in the drawing area.
2. After selecting a switch, you can select additional lighting fixtures to be
included in the system by clicking the Edit Switch System button. Click
the Finish Editing System button once you have selected all of the
fixtures for the system.
3. To view the system, place your mouse pointer over any item that is part
of the system and press the Tab key until dashed lines are shown
connecting the fixture(s) back to the switch. This highlights the system
elements and indicates their connectivity.
4. With the dashed lines highlighted, click to select the system.
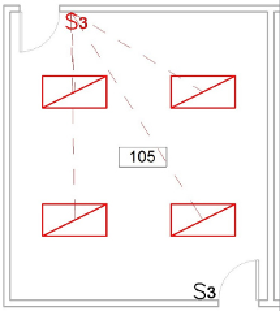
A switch system can contain only one switch, so for lighting fixtures
controlled by multiple switches, such as three-way switches, you can select
only one switch for the system. In the example shown in
Figure 12.17
, the
three-wayswitchatthelowerendoftheroomwouldalsocontrolthelighting
fixtures but cannot be added as part of the switch system highlighted and
indicated with dashed lines.
Figure12.17
Switch system
Switches can be assigned an ID by using the Switch ID parameter, which
helps identify their relationship with lighting fixtures. This parameter exists
in families that are categorized as lighting devices. When you select a
lighting fixture and access the Switch Systems tab, you see the ID of the