Graphics Programs Reference
In-Depth Information
grouped. The key to selecting columns for grouping is to hold down the left
mouse button when you click the first column and then drag your cursor to
highlightthecolumnstobeincludedinthegroup.WhenyouclicktheGroup
button, anewblank header appears above thecolumns, awaiting input. This
is ideal for grouping similar data: locality details, measurements, and so
forth (see
Figure 7.18
)
. Column groups can be removed by highlighting all
the columns within a group and clicking the Ungroup button on the ribbon.
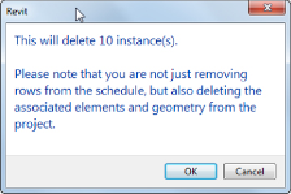
Delete with Caution
It is important to understand what will happen if you click the Delete
button on the ribbon when you select a row in a schedule. If your
schedule is scheduling objects from your model and you delete a row,
all the objects from that row will be deleted from the project.
Depending on how your schedule is formatted, this could be one object
or one thousand objects.
Figure 7.18
Schedule grouping
Another handy feature in Revit MEP 2015 is the ability to add new rows
in the header of your schedule. This lets you use the schedule like a
spreadsheet,soyoucanmakeitlooksimilartothedatasheetsyouhavebeen