Graphics Programs Reference
In-Depth Information
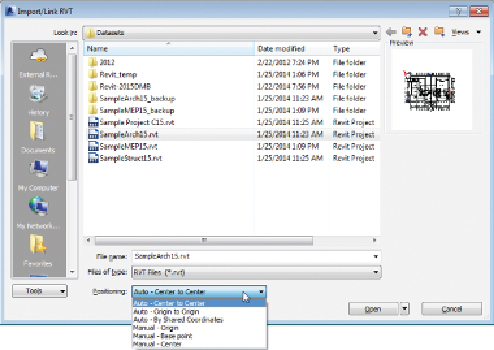
Figure4.4
Positioning options for linked Revit files
2. Once you have chosen a positioning option, you can choose options for
loading worksets, similar to when you open a file that contains
worksets. Just click the pull-down menu next to the Open button. You
can open all the worksets or specify which ones you want. If you specify
worksets to be open, they are the only ones whose components will be
visible when the file is loaded.
3. Click the Open button to link the file into your project. The linked
model file then appears in your file at the location determined by your
Positioning option. If you selected a Manual option, you will need to
click a position in the view window to place the linked model.
4. Once the linked model is in the proper position, you want it to stay
there, so before you do anything with the linked model, it is a good idea
to pin it in place. This will prevent users from accidentally moving the
whole building when clicking and dragging items during design. Select
the linked model, and click the Pin button that appears on the Modify
panel of the Modify | RVT Links tab.
5. Repeat steps 1 through 4 for all the files you need to link into your
project. Once you have all your Revit links in place, synchronize your
file with the central file, or if your file is not using worksharing, simply
save it.