Graphics Reference
In-Depth Information
7.
Press the
Prt Scr
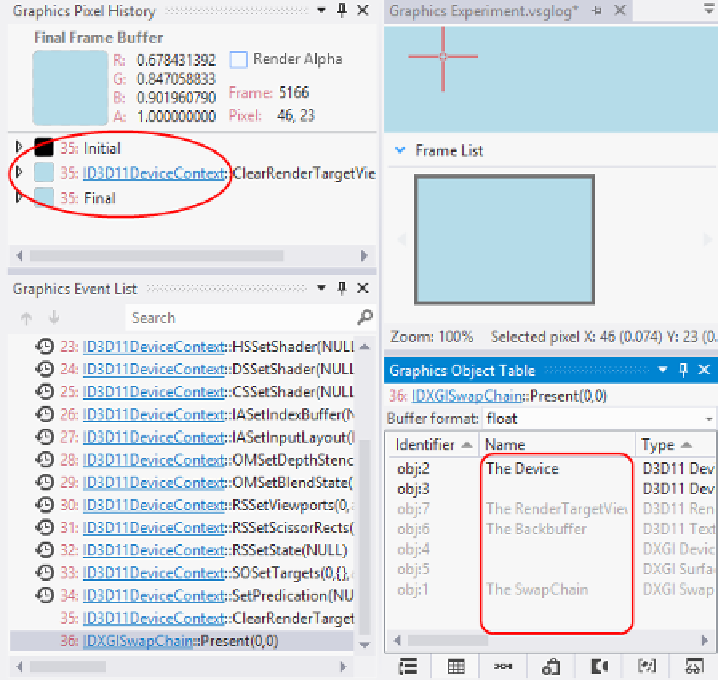
key and you should now have a frame captured in Visual
Studio. Select the frame, and then click anywhere within the preview of the
frame. This will now select a single pixel in Graphics Pixel History as shown
in the following screenshot:
The graphics debugger windows with the pixel history and object table highlighted
8.
Stop the debugger.
Enabling the debug layer and object tracking:
Now that we are able to run the debugger, let's turn on the Direct3D debug layer and enable
object tracking with the following steps:
1.
Continuing from where we were, add the following to
Program.cs
at the start
of the
Main()
function:
// Enable object tracking
SharpDX.Configuration.EnableObjectTracking = true;