Graphics Reference
In-Depth Information
18. Now, within the render loop prior to any draw calls, assign the shader resource views
to the domain shader and the mesh's new
TextureView
property.
context.DomainShader.SetShaderResource(2,
decalDisplacement);
...
var m = meshes[meshIndex];
// Assign decal textures to mesh pixel shader
// using registers t3 and t4
m.TextureViews[3] = decalDiffuse;
m.TextureViews[4] = decalNormal;
19. And lastly, we will hard code an example decal location within the render loop by
updating the decal constant buffer as follows:
var decal = new ConstantBuffers.DecalBuffer();
decal.DecalDisplaceScale = 0.10f; // static scale for now
// Create orthonormalized normal/tangent/bitangent vectors
var decalVectors = new Vector3[3];
Vector3.Orthonormalize(decalVectors, new[] { new Vector3(0,
0.5f, 0.5f), Vector3.UnitX, -Vector3.UnitY });
decal.DecalNormal = decalVectors[0];
decal.DecalTangent = decalVectors[1]; // U-axis of tex
decal.DecalBitangent = decalVectors[2]; // V-axis of tex
decal.DecalPosition = new Vector3(0, 1, 1);
decal.DecalRadius = 0.5f;
context.UpdateSubresource(ref decal, decalBuffer);
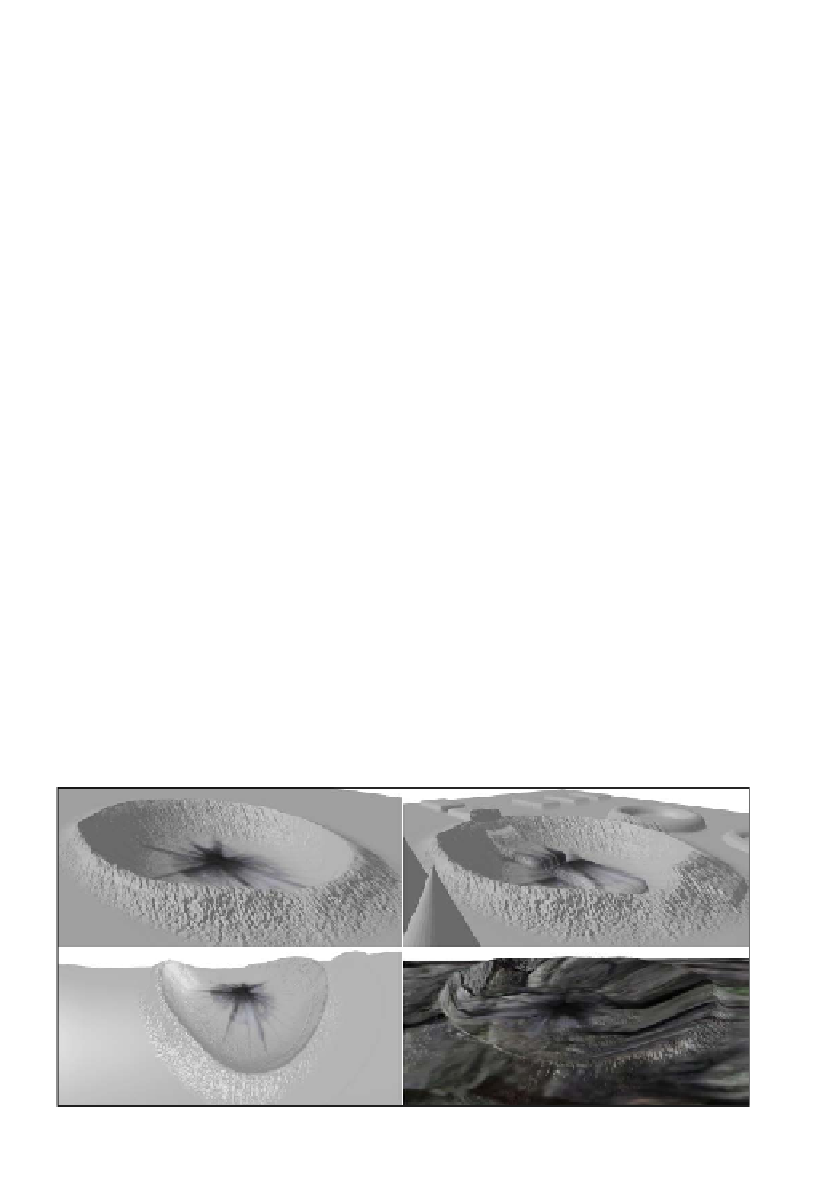
20. That's it! If we compile and run the project now, we will see that the displacement
decal is modifying the existing surface to create a crater as per our textures.
Note that the decal position must be located in the correct position so that it
can be applied to the surface.
Displacement decal shown on plane (top-left), plane with displacement (top-right), corner of cube (bottom-left),
and the tree log (bottom-right).