Hardware Reference
In-Depth Information
Conductive thread connects the fabric contacts on one
side of the garment to a three-wire conductive ribbon
on the other side of the garment. The microcontroller
and battery will be sewn into the bottom band of the
hoodie just below the pocket, and the conductive ribbon
will connect them, sewn onto the inside lining of the
hoodie. Figure 10-21 shows the layout on the inside of the
garment.
Cut a hole in one side of the bottom band just below the
pocket to insert the microcontroller with the Bluetooth
Mate and battery attached. You'll need to be able to get
the battery in and out for charging, so finish the edges
of the hole so they won't fray with repeated use. Iron-on
fabric, or embroidery thread will do the job. Then add
Velcro to the inside edges to provide a closure.
Cut another small slit in the band about six inches (10cm)
away from the large hole so you can insert the ribbon
through the bottom band. Figure 10-21 shows the two cuts.
Iron the conductive fabric contacts into the pocket. Space
them so they cover about the width of the heel of your
palm, and contact it comfortably when you put your hand
in the pocket. Figure 10-22 shows you the inside of the
pocket.
Make sure the LilyPad Arduino Simple is programmed and
the circuit is fully assembled before you sew it into the
garment. The sketch is below.
Split the ends of the three-wire conductive ribbon about
an inch on either end with a pair of scissors. You need
enough distance between the wires to span the space
between the conductive fabric contacts on one end, and
between two contacts of the LilyPad Arduino Simple on
the other. Tin the tips of the outside wire ends to keep
them from fraying. You're not using the middle wire, so
cut it out, down to the end of each split. You can also
embroider the two outside conductors with yarn that
matches the hoodie to keep them from fraying, if you
wish. Solder one pair of the conductive ribbon's leads to
pins 11 and A0 of the LilyPad Arduino.
Position the ends of the ribbon on the inner lining of
the garment opposite the fabric contacts in the pocket.
Sew the conductive ribbon to the contacts through the
material with conductive thread. Use tight stitches for
a good connection. Use a meter to check connectivity
between the contacts and the opposite end of the ribbon
when you've finished your sewing. This way, you know the
signal makes it from the contacts through the garment to
the end of the ribbon that will attach to the LilyPad.
4
3
1
2
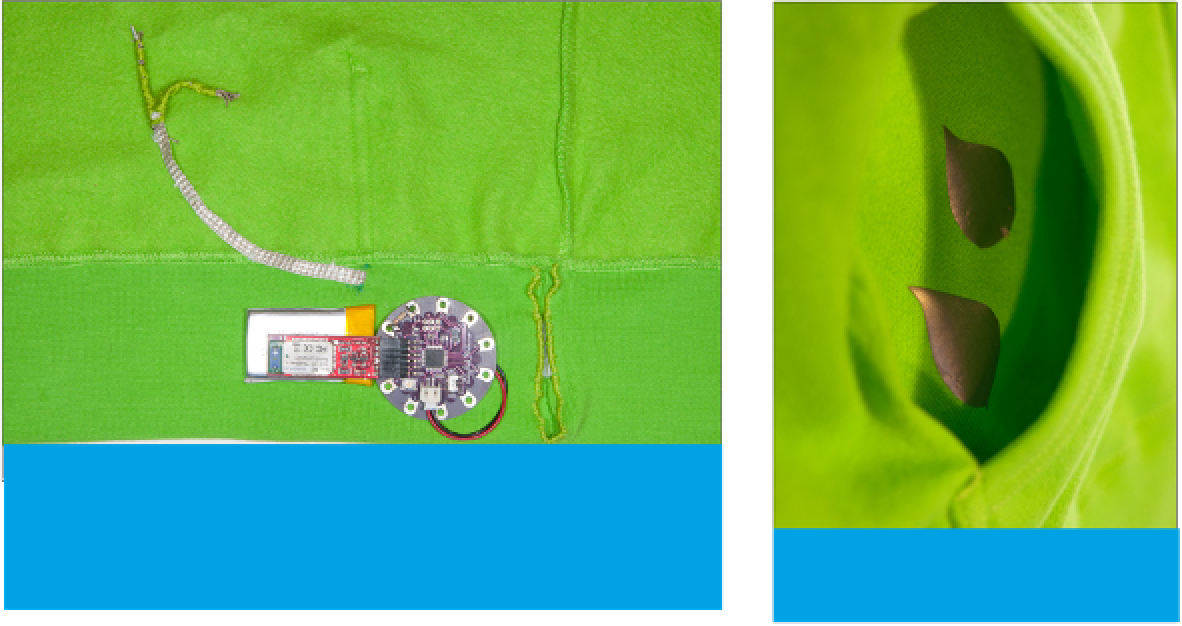
Figure 10-21.
The layout of the hoodie components on the inner lining: 1.
The LilyPad Arduino and the battery are actually inside the bottom band of the
garment, inserted through 2. the large cut on the right. The conductive ribbon
comes out of the bottom band through 3. the small cut, and goes to 4. the
pocket contacts at the top (opposite side of the garment).
Figure 10-22.
The conductive fabric
contacts inside the hoodie pocket.