Hardware Reference
In-Depth Information
Each grouping represents a different radio. The first
number is the radio's source address (the number you get
when you send it the command string
ATMY
). The second
is the high word of the radio's serial number; the third is
the low word. The fourth number is a measurement of the
radio's received signal strength—in other words, it tells
you how strong the radio signal of the query message was
when it arrived at the receiving radio. The final line gives
the radio's
node identifier
. This is a text string, up to 20
characters long, that you can enter to name the radio. You
didn't use this function in Chapter 6, so your radios may
not have node identifier strings. If you want to set the node
identifier for further use, type:
ATNI
myname
, WR\r
Replace
myname
with the name you want.
Broadcast messages are useful for many reasons.
However, they should be used sparingly because they
create more traffic than is necessary. In the next project,
you'll use broadcast messages to reach all the other
objects in a small, closed network.
Upgrading the Firmware on XBee Radios
To use the node discover, node identifier, and some of the
other XBee AT commands covered in this chapter, your
XBee radios need to be upgraded to at least version 10A1.
To check the firmware version of your radios, send the
following command:
ATVR\r
.
The radio will respond:
10A2
.
If the number is 10A1 or above (remember, it's in
hexadecimal),you're good to go. If not, go to
http://www.
digi.com/support/kbase/kbaseresultdetl.jsp?kb=125
and download the X-CTU software. Bad news, Mac OS X
and Linux users: it only runs on Windows. You can run it
under VirtualBox (free), Parallels ($80), VMWare ($80), or
Windows using Bootcamp (Mac) or by dual booting (Linux).
to go. The X-CTU software is useful to keep around, because
it also lets you change and record your radio's settings
without having to use the AT commands.
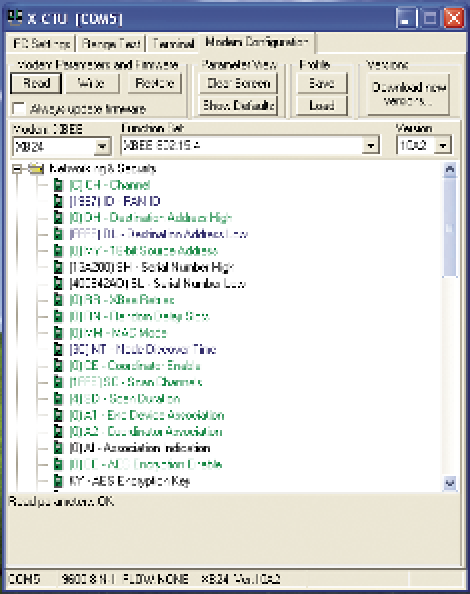
Once you've installed the software, launch it. On the PC
Settings tab, you'll be able to select the serial port to which
your XBee radio is attached. Pick the port and leave the
rest of the settings at their defaults. Click the Modem Con-
figuration tab and you'll get to where you can update the
firmware. Click the Read button to read the current firmware
on your radio. You'll get a screenful of the settings of your
radio, similar to that shown in Figure 7-2. The firmware
version is shown in the upper-righthand corner. You can pull
down that menu to see the latest versions available. Pick
the latest one, then check the "Always update firmware"
checkbox. Leave the Function Set menu choice set to
XBEE
802.15.4
. Then click the Write button. The software will
download the new firmware to your radio, and you're ready
Figure 7-2.
The X-CTU Modem Configuration tab.