HTML and CSS Reference
In-Depth Information
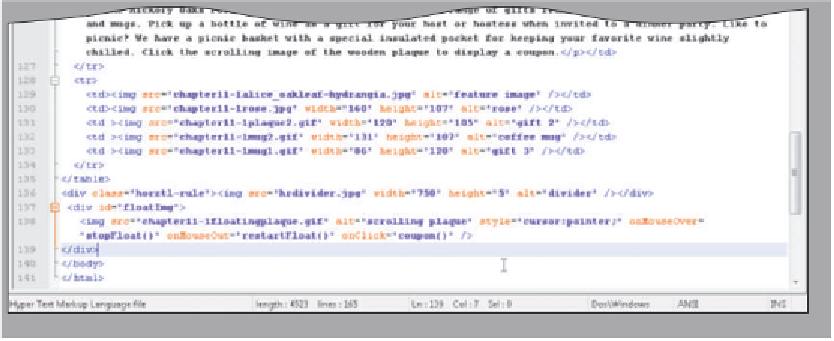
To Enter <div> and <img> Tags for the Floating Image
The following step shows how to enter the <div> and <img> tags.
1
•
Click line 137 to
place the insertion
point on the blank
line before the
</body> tag.
<div> tag container
with <img> tag
and mouse event
handlers for
floating image
•
Enter the HTML code
shown in Table 11-17
to create the <div>,
<img>, and </div>
tags for the floating
image at this position
on the Web page
(Figure 11-26).
do not press
the
e n t e r
key
do not press the
e n t e r
key to start a new line
Figure 11-26
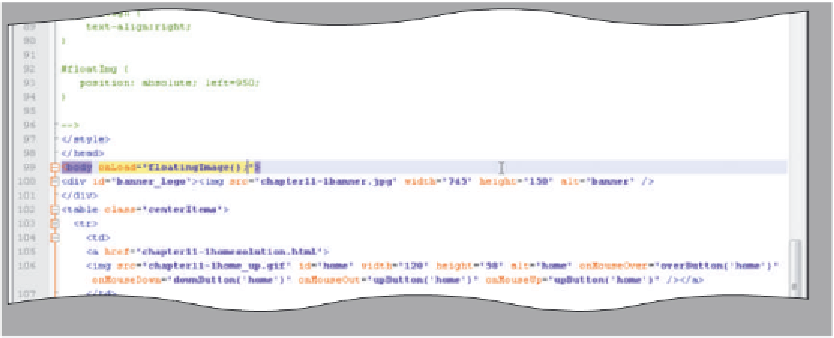
To Add an OnLoad Event Handler to Call the floatingImage() Function
The final step in modifying the Gift Shop Web page is to enter the onLoad event handler to call the
floatingImage() user-defined function as soon as the Web page is loaded. The following step adds the onLoad
event handler to the <body> tag.
1
•
Click line 99.
•
Position the insertion
onLoad event handler
to start the floating
image
point between the
y in body and the >
symbol and press the
s p a c e b a r
once.
do not press
the
e n t e r
key
•
onLoad=
”floatingImage();”
and do not press
the
e n t e r
key
(Figure 11-27).
Type
Figure 11-27
To Save an HTML File and Test a Web Page
With the code for the Gift Shop Web page complete, the HTML file should be
saved and the Web page should be viewed in a browser to confirm the Web page appears
and functions as desired.
1
With a USB drive plugged into your computer, click File on the menu bar, and then click
Save As on the File menu.
2
Type
chapter11-1shopsolution.html
in the File name text box to save the file with
a new name, and then click the Save button in the Save As dialog box.