Game Development Reference
In-Depth Information
•
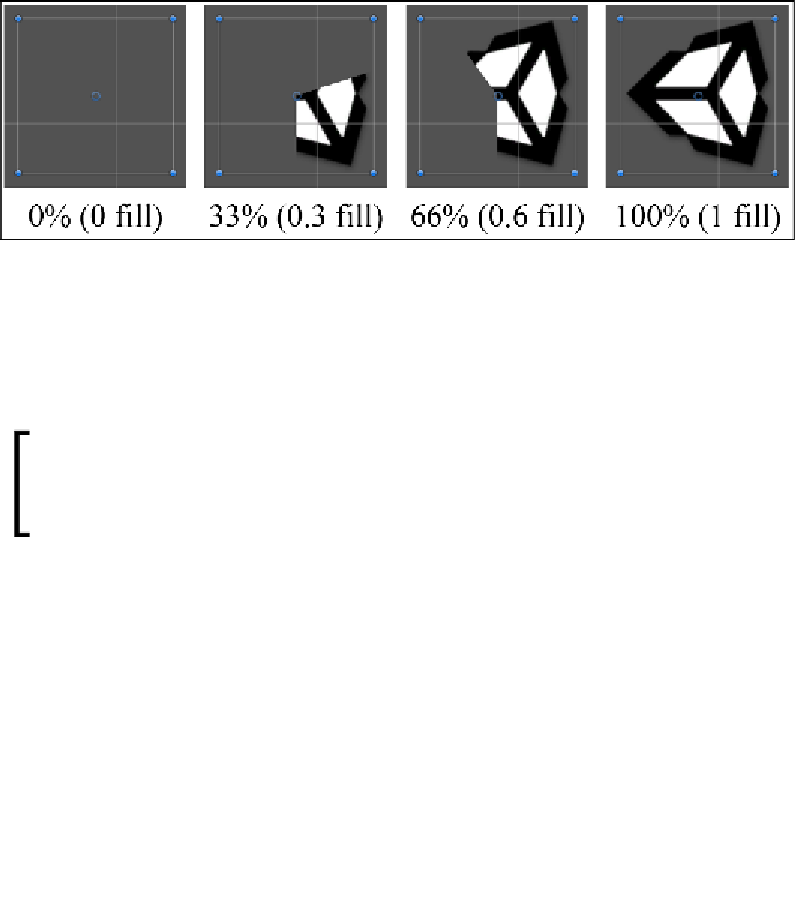
Fill Amount
: This is a simple slider that ranges from
0
to
1
to control the
percentage of the image that is filled
•
Clockwise
(only available for Radial fills): If you don't like the direction the
fill is facing, then flip it to the other direction; simple!
As an example of a
Radial360
fill, see the following progression by altering the
Fill
Amount
property:
Adding animation to the mix
One good fact about the new
UI
system is that each and every part can be
fully animated. To show this, let's build a simple animation logo using the
Filled Image
control.
Note: We will only be covering the basics of the Unity Animation system
here as it's outside the scope of this title. I'd recommend picking up a good
Unity 2D title to learn more about it. I'm sure I've seen one somewhere!
First off, let's build a quick animation to control our
Image
:
1.
Create an
Image
control called
LoadingLogo
and apply a sprite to it, then set
the
Image Type
property to
Filled
.
2.
Ensure that the
Filled Amount
is set to
0
.
3.
Create a new folder in your project called
Animation
and two sub folders
called
Controllers
and
Clips
(you can skip this step if you wish, it's a
standard thing for me).
4.
Create a new
Animation Controller
by
navigating to
Create
|
Animator
Controller
from the project menu and saving it in the
Animation\
Controllers
folder.