Graphics Reference
In-Depth Information
Figure 20-9. Configure the feedrates for all three axes.
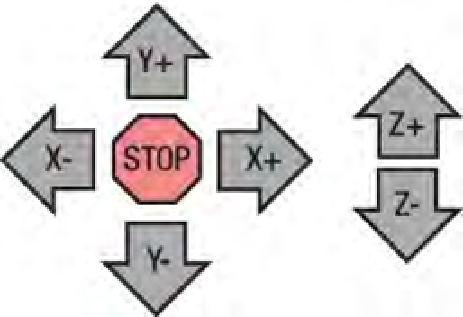
To move a mechanism (or “jog” them), just tap and release that mechanism's respective axis letter
(X+, X-, Y+, Y-, Z+, Z-) as shown in Figure 20-10. If the movement seems correct and moving at the
expected distance (based on the estimated jog rate of 1mm per tap) for each press of the button, then the
axes are configured correctly. As you are moving the axes around, remember the location of the Stop
button. You will want to press the Stop button if either the X or Y axis gets too close to an edge, if the Z
axis lead screw threatens to exit the anti-backlash nut, or if the Extruder gets too close to the table.
Figure 20-10. Jog the three axes using the + and - buttons.
You may find that an axis is moving in the wrong direction. Looking at the front of the machine, the
X-axis (moving left or right) should move to the right when the X+ button is pressed and to the left when
the X- button is pressed. The Y-axis should move towards you when the Y+ button is pressed (seems
counter intuitive) and away from you when Y- is pressed. The Z-axis will move down as the Z- is pressed
and up as the Z+ button is pressed. If any axis is moving in a direction opposite to what's described here,
that axis needs to be inverted. To invert an axis, click on Machine
Motherboard Onboard Preferences,
as shown in Figure 20-11.

Search WWH ::

Custom Search