Graphics Reference
In-Depth Information
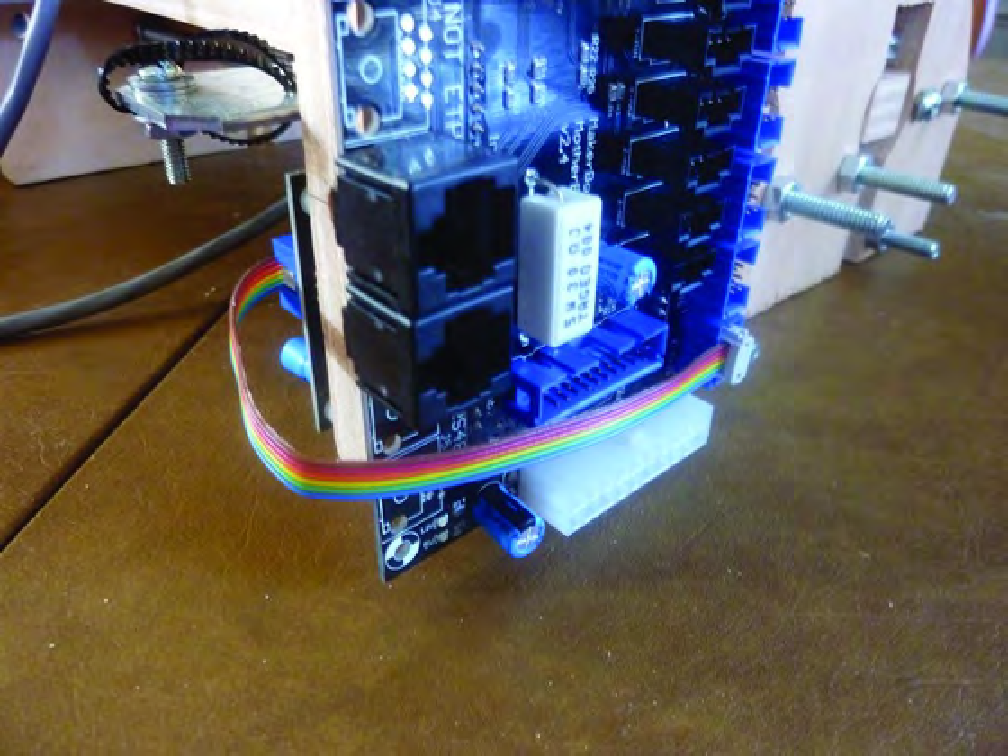
Figure 17-8. X-axis motor driver connected to motherboard with six-wire cable
Connect Y- and Z-Axis Motor Drivers to Motherboard
Next you'll connect the Y-axis and Z-axis motor drivers to the motherboard using the same process used
for the X-axis. This time, however, you'll need longer ribbon cables, and you'll need to route them to
keep them away from moving parts. You'll need approximately two and a half feet of cable for each
motor.
Put one connector on the end of each cable and use a pair of pliers to close (crimp) it. Then place a
second connector onto each ribbon, but do not crimp the second connectors. Figure 17-9 shows the Y-
axis and Z-axis motor drivers, each with a cable plugged in. Note that the second connector on each
cable that can move freely on the ribbon. (Notice also in Figure 17-9 that we've written Y-axis below the
motor driver on the left and Z-axis below the motor driver on the right - you can reverse this, but just
remember which is which.)
Search WWH ::

Custom Search