Graphics Reference
In-Depth Information
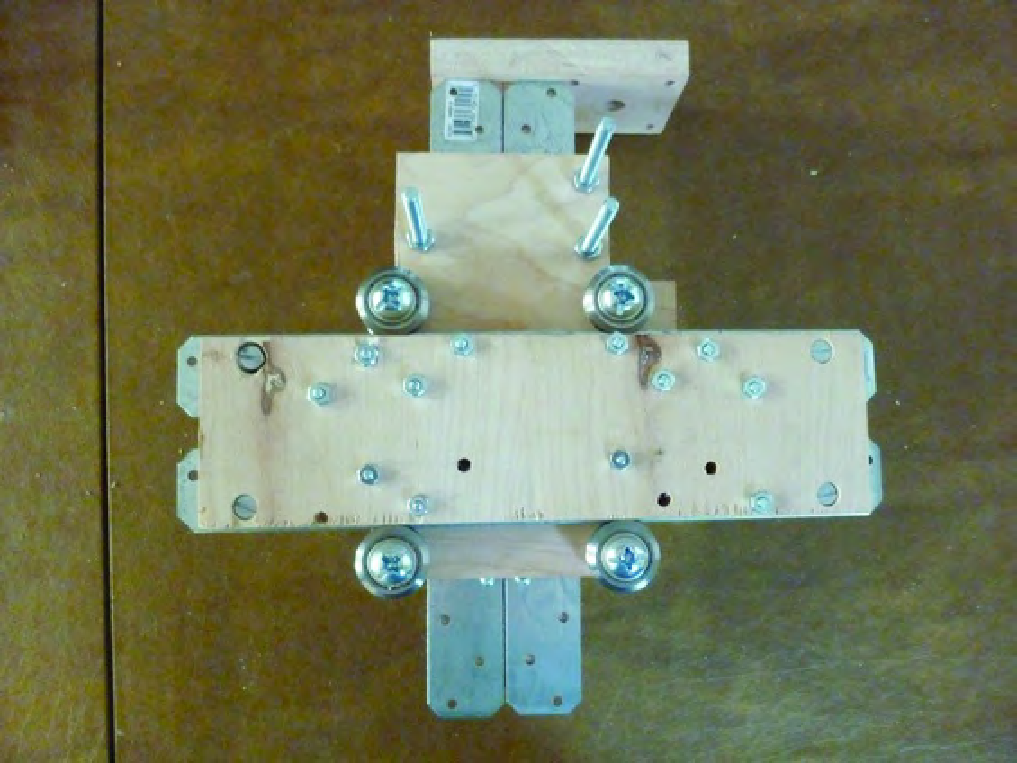
Next, flip the ZY Plate over so that the v-groove bearings not currently being used (on the backside
of the ZY Plate) are facing up. Insert Part H as shown in Figure 11-4.
Figure 11-4. Insert Part H into the ZY Plate (Part D) sub-assembly.
When inserting a rail, push one of the Strong-Tie rails firmly against the v-groove bearings (the rail's
edge should fit in the center of the v-groove bearings) and then tighten down the two #8 bolts before
adding the additional six #8 bolts (and nuts). By locking down one rail, you can now move the remaining
rail in or out so that it fits snugly into the v-groove bearings on the right. If you tighten down the Strong-
Tie rails properly, Part H should roll back and forth in a smooth manner on the v-groove bearings. If your
rails are still not rolling smoothly, you may need to drill out one or two of the v-groove bearing holes to
allow you to adjust the bearings for a tighter fit.
Figure 11-5 shows two of the holes used for the v-groove bearings. These holes have been enlarged
to allow the bolts more freedom of movement. We chose to enlarge one hole to allow the bolt to move
only up and down (along the z-axis); the other hole was enlarged to allow its bolt to move left and right
(along the y-axis). (This is one of those times where you will have to examine the movement of your rails
and determine what adjustments need to be made to allow for smoother movement.)
Search WWH ::

Custom Search