Graphics Programs Reference
In-Depth Information
Instead, you use layers to “cut holes in” or
“stencil” shapes into other object layers.
For the next exercise, I've created a sim-
ple white plane (a two-dimensional box) and
use the text we created in the Extrude
exercise to “stencil” the shape of the text
onto the plane (see Figure 3-76).
Note
You should notice that the plane to be sten-
ciled in Figure 3-76 has five width segments
and three height segments. This is because
the text I wish to stencil has 2,876 points on
its face polygons. Trying to stencil this would
be asking LightWave to try to have many
more than its maximum number of points
per poly in the resultant white plane that
bound the letter shapes.
I've helped LightWave by breaking this
plane up into segments, so the maximum
point-per-poly limit won't be pushed by any
one poly. (After the Solid Drill operation,
using the information window for all polys, I
was told that the largest number of points
any poly had was 428.)
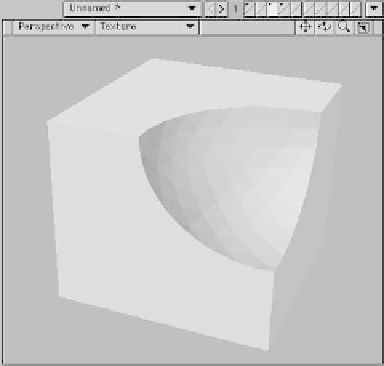
Figure 3-74
Showing only the foreground layer after the
Boolean operation, we see the “bite” taken
out of the cube by the volume of the sphere.
Notice how the sphere's orange surface is now
the color for the “bitten” polys!
With Solid Drill, you don't “carve out”
bits of an object like you do with Booleans.
Note
When you do a Boolean operation, the
points of the “bitten” polys aren't “stitched”
directly to the points of the original object
— this gives a nice, sharp edge when both
surfaces have Smoothing active. This can
cause a problem if you do a lot of selecting
with the Select Connected tool because the
two pieces aren't really connected; they're
only laying
exactly
on top of each other,
which
isn't
the same thing.
•
Automatic
“fuses” multiple points into
one point only if the points are laying
exactly
in the same space, with not even a
micrometer difference between their
exact
position. This is what you use to fuse the
pieces after a Boolean operation.
•
Fixed
lets you decree “all points that are
within 'X' mm of each other shall now
become one,” and so forth.
After you've merged points, especially if
you've just merged with the Fixed option, it's
a good idea to peruse the Point and Polygon
Statistics windows. Merging points gets rid of
points, not the poly information tacked to
those points. You need to check to see if you
have any “0 Point” or “2 Point” polygons (or
points that don't belong to any polygons at
all) that you don't specifically want.
After merging points, you may have to
adjust the smoothing angle of your surfaces
so they still give you a nice, sharp edge
where they meet.
Figure 3-75
To connect the “bitten” part of a Boolean
operation with its original object, you must
use
Detail | Points | Merge Points
.