Graphics Programs Reference
In-Depth Information
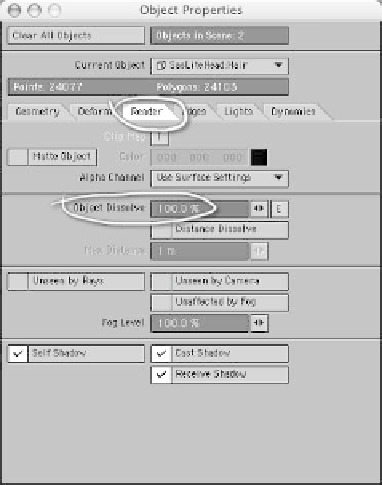
So, with the Object Properties window still
open, click on the
Render
tab, and set the
Object Dissolve to
100%
. That won't have
any effect on SasLite, but it will cause
LightWave to ignore the guides when it
renders. (Don't forget to disable the shad-
owing as well to save render time.)
sides that will be visible in your final
render, until you have what you want.
(Don't be afraid to copy and paste sec-
tions of guides to duplicate them if
there's a thin spot in the hair. Just be
aware of the SasLite limits when you
do.)
The whole process can take an hour or
more, but the results are well worth it.
(Besides, if you get a nice wig, you can
often reuse it for other characters with a
minimum of restyling.)
Figure 20-57: Set the Object Dissolve to 100% to
hide the long hair guides.
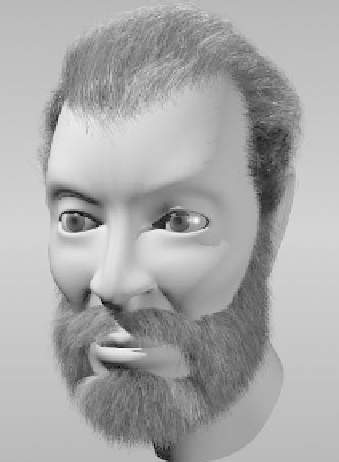
5.
Tap <
F9
>, and see what you've got. If
you need to go back and tweak the
guides, do that and make another ren-
der. Keep going, checking from all the
Figure 20-58: The finished wig-and-beard
combo.
Long Hair Guides, the Sequel!
We're going to use another method of deal-
ing with long hair guides to give this guy
some eyelashes. This one is a lot faster, at
least for me, but it does use a couple of
third-party plug-ins. The good news is that
you can download them from the web for
free.
1.
Select a couple of polys from the eyelid
where you want the eyelashes to grow.
Then go to
View | Selection: More |
Select Loop
to get the “rim” of the
whole lid. Tap the <
}
> (right curly
bracket) key to expand the selection to
the loops above and below that, so that
there won't be distortion when they