Graphics Programs Reference
In-Depth Information
Note
One of the first things you learn as a painter
is that no matter how many
visible or implied
lights
there are in an image,
there is only
one primary light source
. Unless you have a
darn good reason for breaking this conven-
tion, all things in a scene should show the
effect of the
primary light source
; all other
light sources should be handled with such
subtlety that they go almost unnoticed to the
untrained observer. (When in doubt about
complex lighting, or when you have a lim-
ited time to ray-trace, shadows are cast
only
from the primary light source.)
These conventions have worked for hun-
dreds of years. But even so, you still don't
have to take it as “law,” just as an idea to
help make your own work better,
faster!
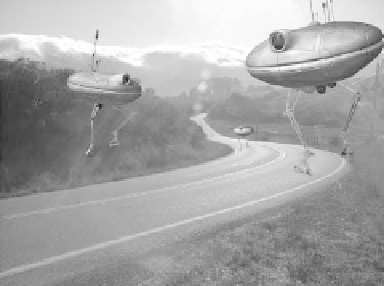
Figure 17-34: Doing an <F9> shows us what
we've got so far. It's not bad and could probably
pass as okay in some lower-end productions. But
something is amiss: The lighting on the 'droids is
coming from a completely different angle than
where the sun obviously is in our plate!
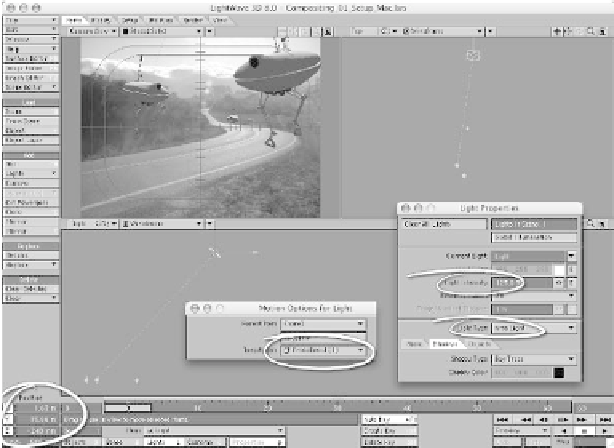
3.
Let's change our light to an area light
so it will cast realistic shadows. In its
Motion Options window, set Target
Item to
ProbeDroid (1)
(the middle
'droid in our scene), so when we move
our light, we don't have to worry about
aiming it as well. Move it to where the
sun would be
relative to our 'droids
,
based on what we're able to surmise
from our live-action plate (I found X=1.63,
Y=15.88, Z=-240 mm to work well). Set
Light Intensity to
125%
. (I always have a
value of over 100% for sunlight; it gives
harsher lights and darks — chiaroscuro —
and
feels
more like outdoor lighting.) Make
sure Shadow Type is set to
Ray Trace
,
activate
Trace Shadows
under Rendering
Options, and do an <
F9
>.
Figure 17-35