Graphics Programs Reference
In-Depth Information
•
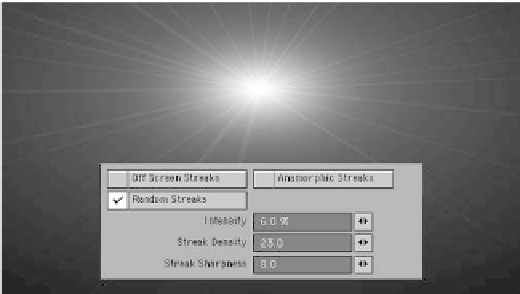
Random Streaks
are
the fine, numerous “spiky
streaks” that help give the
impression of something
being painfully bright.
•
The
Reflections
tab
offers access to a multitude
of settings to recreate the
sun dogs that appear when
light catches within the mul-
tiple layers of camera optics.
(I'd suggest using this set-
ting sparingly, creating your
own custom combinations of
elements instead so this effect doesn't look
canned.)
Figure 17-27: Random Streaks.
Let's go back to the fake volumetric light
scene we were working on in the previous
section of this chapter, as shown in Figure
17-29.
1. Set the light's Parent to your “shaft of
light” object, and move it numerically
to X=0, Y=0, Z=0. (I've changed my
light from a distant light to a point light,
but this doesn't really matter.)
2. Activate
Lens Flare
for the light, and
open the Lens Flare Options window.
Deactivate Central Ring and Red Outer
Glow. Activate
Anamorphic Distor-
tion
and
Anamorphic Streaks
.
(Leave everything else as is.)
3. An <
F9
> gives you something you
might see hovering over a rural land-
scape on
The X-Files
. (See Figure
17-29.)
One of the best ways to use lens flares is to
work them into your scene in such a way
that the viewer isn't even aware that a lens
flare is being used. (Huh?) That's right!
When you have a flare that is just a Central
Glow with a high Intensity and a fairly high
Figure 17-28: The Reflections tab.
Flare Dissolve, the flare serves more to add
a bit of “light bloom” to the entire scene,
giving the same feel that lights do when
“catching” in a faint hint of haze. This faint
hinting is indicative of the elusive quality of
subtlety that runs through all I try to con-
vey to an up-and-coming artist. Anyone can
tell the difference when shown a render
“with” and a render “without,” but on its
own, it doesn't jump out at the viewer
because it just looks good.