Graphics Programs Reference
In-Depth Information
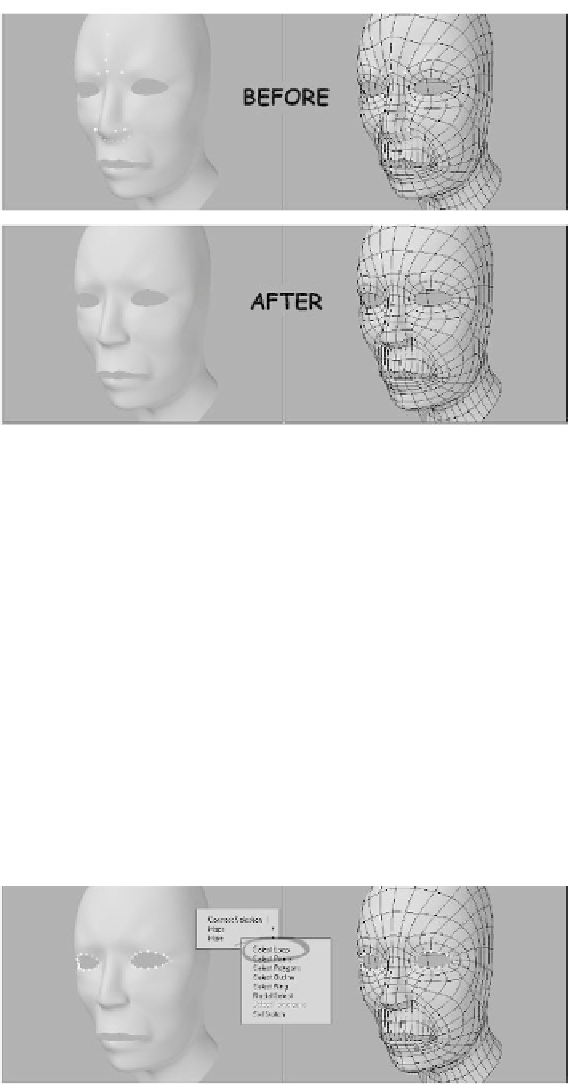
Figure 14-89: Smooth out the forehead and tighten up the bottom of the
nose.
Let's add a little extra geometry to the eyes
so they don't look like paper cutouts.
3.
5.
Click the
Modes
button at the bottom
of the interface and change your Action
Center to
Mouse
.
Select one or two of the points running
along the loop at the inside of the eye.
Then navigate to the
View | Selec-
tion | More | More
menu and choose
Select Loop
. All of the points around
the inside of the eye will be selected.
6.
Activate the Stretch tool (<
h
>) and
position your mouse over the center of
the eye on the positive side of the X
axis in the Back viewport. (This is the
left eye of the model.) Stretch the new
points down and in slightly. Then acti-
vate the Move tool (<
t
>), and in the
Right viewport move the points
slightly back into the head. Figure
14-91 shows the results.
4.
Navigate to the
Multiply | Extend
menu and choose the
Extender Plus
tool. The geometry around the inside
of the eye will automatically be
extended.
Figure 14-90: Select the points around the inner edge of the eye socket.