Graphics Programs Reference
In-Depth Information
Patching the Cage
Let's begin patching the cage. Make sure
that you've set your spline color to Black
and your default sketch color to White as
described in patching Tip #3. Then maxi-
mize the Perspective viewport and change
the view mode to Color Wireframe. Hit
<
a
> to “fit all” so that our cage fills the
screen as shown in Figure 14-72.
You can begin anywhere you'd like, but
the area around the eye is a nice place to
start.
1.
Note
You can access the Make Spline Patch win-
dow from the Construct | Patches | Patch
menu item, but I recommend using the
<Ctrl> + <f> keyboard shortcut as it will
save you a good deal of time.
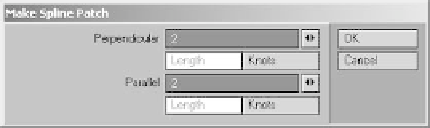
2.
The default for a spline patch is 10 Per-
pendicular and 10 Parallel divisions
distributed over the Length of the
splines. However, 10 is far too many for
the cage we've built. Change each of
these to
2
. Leave the distribution set to
its default (Length) and click
OK
. The
Select four splines in a clockwise or
counterclockwise order and press
<
Ctrl
>+<
f
> to bring up the Make
Spline Patch window.
Figure 14-72: We're ready to begin patching!
Figure 14-73: The proper patch settings.