Graphics Programs Reference
In-Depth Information
Spin your model around in the Perspective
viewport and move any points that seem
out of place. If you feel that you need more
control over your splines, you can add
points to help adjust their shape. When
you're finished, save a new version of your
model.
Before we wrap up this section, there are
two more things we should do.
The first is to run a Merge Points opera-
tion on our model. As I mentioned earlier,
the number one cause of the “Curves Do
Not Cross” error is splines whose points
are not welded together. By running a
Merge Points operation, we can ensure that
any stray points are fused together and pre-
emptively ward off this infamous error
message.
Press the <
m
> key to bring up the
Merge Points window. Accept the default
settings and press
OK
.
The second thing we should do is merge
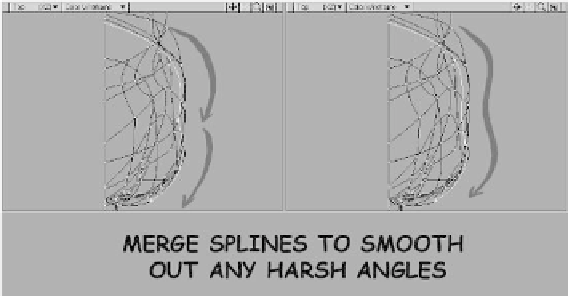
a few of these splines. Take a look at Figure
14-69.
The image on the left shows two splines
that follow the same path from the top of
the eye to the back of the head. At the point
where these splines meet, there is a sharp
dip. This dip isn't a major problem and
won't affect our ability to patch this region,
but it will have a subtle effect on the overall
shape of our model. As such, it's a good idea
to merge these splines together.
With the two splines selected, press
<
Z
> to merge them into a single spline.
The image on the right of Figure 14-69
shows the effect of merging these splines
together. Note that the slope is now much
more gradual.
You can continue working through your
spline cage at this point, merging splines
which, like those mentioned above, follow
the same basic path but meet at sharp
angles. The splines highlighted in Figure
14-70 are just a few of the ones I would rec-
ommend merging.
Figure 14-69