Graphics Programs Reference
In-Depth Information
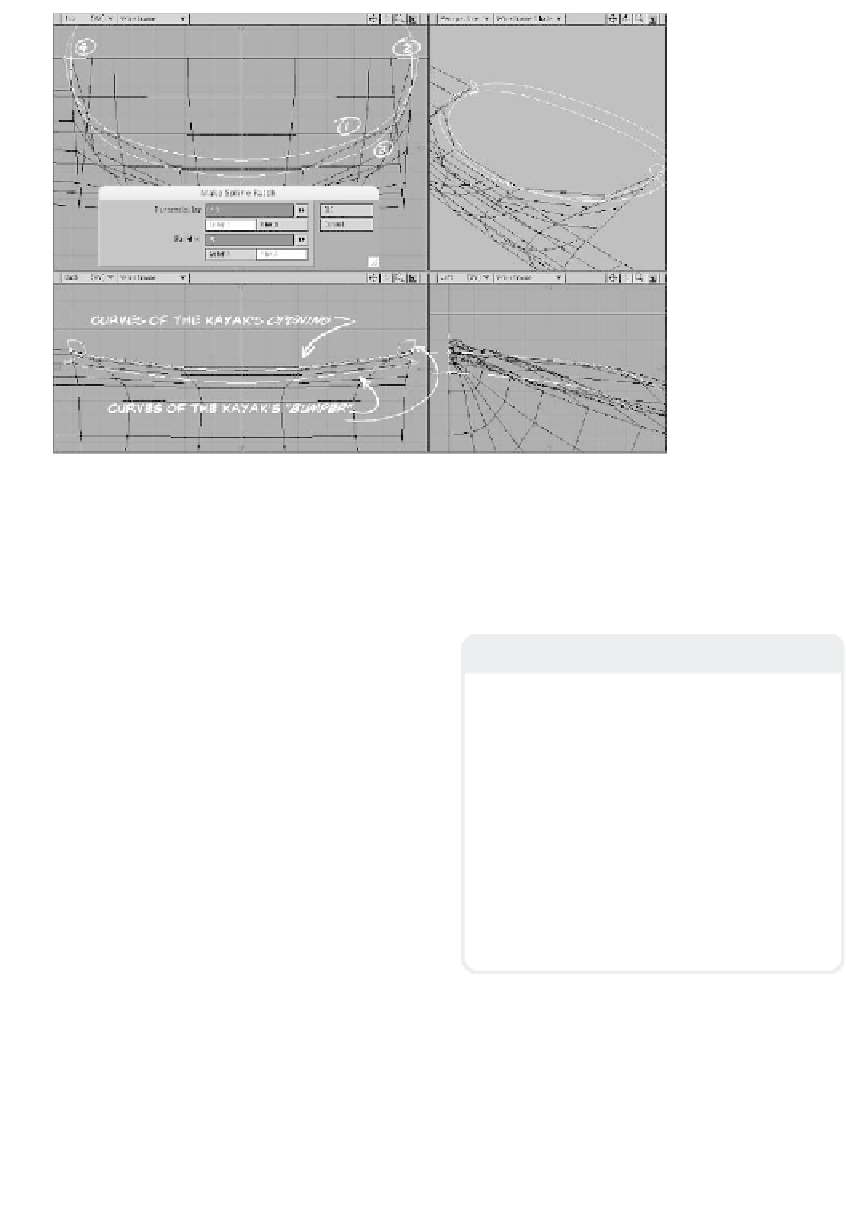
Figure 13-16
16. Now, working with the curves that
define the rubberized bumper and the
opening on top of the kayak, select the
curves in the order shown in Figure
13-16. Fill in the Make Spline Patch
window with Perpendicular set to
10
segments distributed WRT
Length
(for a nice, soft feel to its silhouette)
and Parallel set to
5
segments distrib-
uted WRT
Knots
(so the bumper's
segments will line up perfectly with the
segments of our kayak's opening).
17. The resultant patch may look pretty
angular as it skirts the rim of the
kayak's opening, but I'm planning on
using this as a sub-patch model, so it'll
be fine. (Notice how the segments of
the bumper and the opening line up
perfectly.) Assign these polys a surface
appropriate for a rubberized bumper,
and copy and paste the bumper onto
your assembly layer.
Note
Wouldn't it be nice to be so brilliant that you
know exactly what every setting does at
every turn? I'm pretty far away from that
myself. To get the above settings correct to
match the bumper up with the kayak's
opening, just like anyone else, I had to play
around with it a bit until I found the right
settings. Still, I didn't trust it just
looking
right. I tested it, copying both patches to a
“junk” layer and using Merge Points to see if
it fused the two sections together.
No one's perfect. Don't bust your chops if
you're not.