Graphics Programs Reference
In-Depth Information
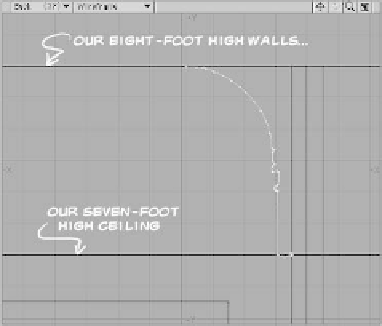
Figure 6-18
30. Delete the edge that extends outside
the floor plan (Figure 6-18). Then
delete all points from those polygons
that do not fall directly on a
corner
of
those polygons.
31. Now we're going to do the cornice
work on the ceiling. You could draw a
cornice yourself, but a cool thing about
Rail Bevel is that you can save neat
bevels for later. Load
Objects\Chap-
ter06\Cornice_SubtleElegant.lwo
.
32. Copy and paste this into a clean fore-
ground layer of your model with the
floor plan
and
the ceiling in the back-
ground layers. Press <
A
> to zoom in
on the cornice rail in the foreground
layer. We can see that the cornice rail
starts where we put our ceiling polys
(at seven feet) and “does its thing,”
ending up gracefully blending to the
height of the top of our walls at eight
feet (where one would normally expect
an eight-foot ceiling to be).
33. Now, with
only
our ceiling in the fore-
ground layer and
only
our cornice rail in
the background layer, activate
Rail
Bevel
, and in the Numeric window,
enter
-100
% for the Shift (pushing it
up 100% of the distance outlined by the
cornice rail) and
-140%
for the Inset,
so our bevel's points line up directly
with the cornice rail that we can see in
the background layer.
Instant cornices!
(See Figure 6-20.)
Figure 6-19