Graphics Programs Reference
In-Depth Information
23. With the new boxes created in Figure
6-13 in the background layer and your
floor plan in the foreground layer,
Solid
Drill | Stencil
a new surface with the
name
Window_Molding
onto your
floor plan. (You may want to go into the
Surface Editor afterward and adjust the
color of this new surface so it stands
out from the default surface on the rest
of the model.)
24. With the old window boxes (the
smaller ones) in the background layer
and your floor plan in the foreground
layer,
Boolean | Subtract
the holes
for your windows.
25. Merge points using the same fixed set-
tings we've been using, and delete both
the window boxes and the new boxes.
26. Next, with a Grid Snap Value of
6"
,cre-
ate two boxes that will be used to
Boolean the walkways that will not
have doors in them, as shown in Figure
6-15. They should be three feet wide,
extend just below the ground plane,
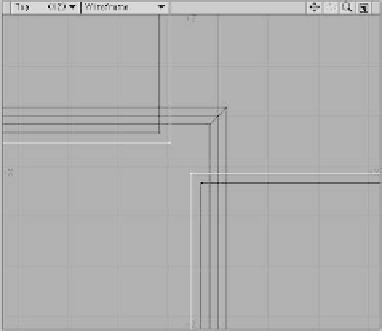
Figure 6-13
22. Now, copy and paste those “window
boxes” into a fresh layer and Smooth
Scale them
2"
. This will have the effect
of making these boxes one inch larger
all the way around (shown in Figure
6-13 with both the “old” window boxes
and the floor plan in the background
layers). We will be using these “new”
boxes to stencil an area we will use
later as a molding around each window.
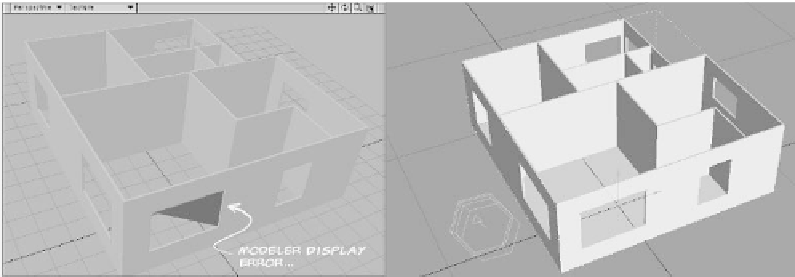
Figure 6-14: I'm not sure why, but sometimes Modeler doesn't quite know how to display a Boolean that is
completely inside a large, flat surface like this wall. In Layout's Shaded preview, the Boolean looks fine;
more importantly, it renders correctly. This little display error is just one of those things where, after testing
to be absolutely sure, you have to be content with knowing that you're right and the computer is wrong.