Graphics Programs Reference
In-Depth Information
detail in your texture than can fit in a single
pixel of LightWave's rendered image.
Strength is a level of how much of an effect
Texture Antialiasing will have on the tex-
ture map (the default value of 1 works well
for most cases; higher levels can cause the
texture to look blurry). Pixel Blending and
Texture Antialiasing are the same for all
image mapping types.
Note
Remember, to see the texture (UV or other-
wise) in LightWave's viewports, you've got to
set the Viewport Display Type to Texture or
Textured Wireframe!
All this is interesting, but when most peo-
ple in “the industry” think of UV mapping,
they're thinking of
atlas UV mapping
. This
is where you break apart
your object into sections,
like in a geographic atlas, so
you can more easily wrap
your mind around the geom-
etry for which you are
painting texture maps.
Creating a UV texture of
the Map Type Atlas “lays
out” the faces of this cube so
each one is easily accessible.
•
Relative Gap Size
tells
LightWave how much space
you want between the
groupings on the atlas UV
map.
•
Segment by Surface
will make sure that polys of
different surfaces are sepa-
rated on the atlas map, even
if they are on the same rela-
tive plane.
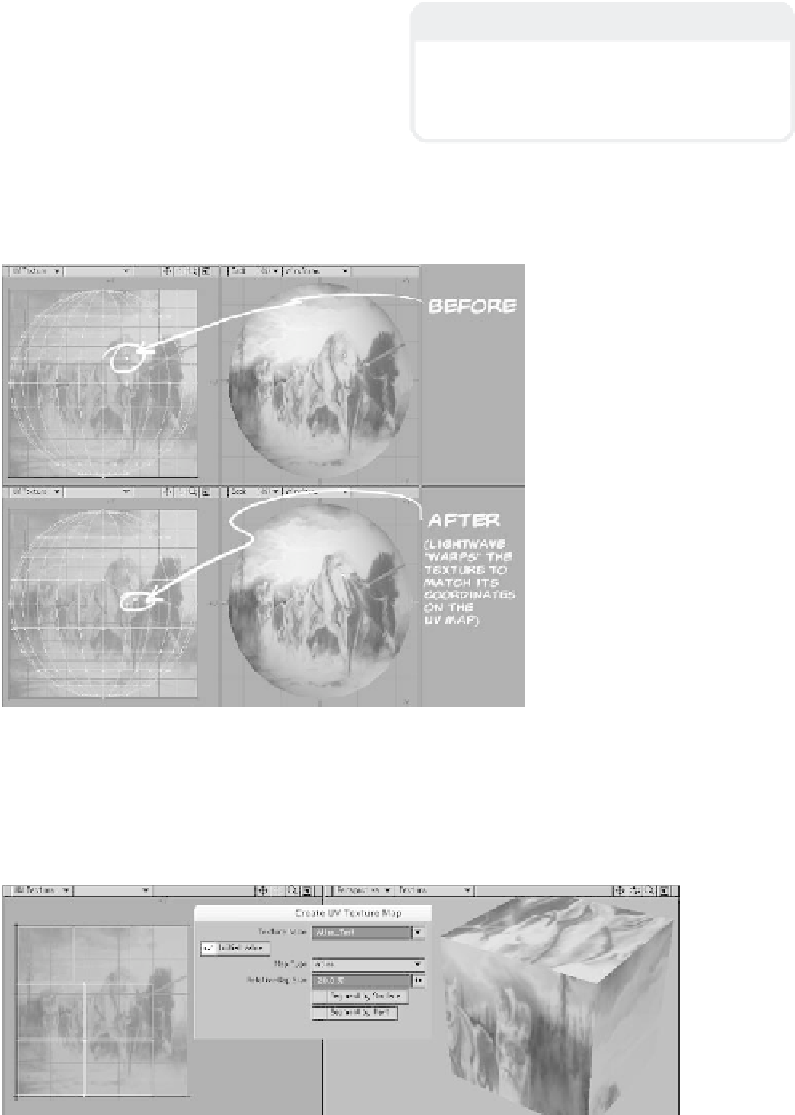
Figure 5-66: Point(s) selected on the model will also show up as
selected in the UV Texture viewport. Moving a point in the UV Texture
viewport will not alter its position on the model; LightWave will use its
position on the image map to “warp” the image map's position on the
geometry. (Similarly, moving a point on the geometry will not alter its
position on the UV map.) This is how you tweak a map to fit the
“landmarks” of your model — eyes, noses, cheeks, whatever!
Figure 5-67: The Create UV Texture Map window for an Atlas map type.