Graphics Programs Reference
In-Depth Information
Note
Align to Path is a controller available
only
for heading and pitch. You will want to go
through your movie and, with
General
Options | Auto Key Create | Modified
Channels
selected, rotate your camera on
bank where it seems fitting. (You can always
reload the motion file onto the camera if
you don't like what you've done — so
explore and experiment!)
14. Open the Surface Editor, and onto your
tunnel's surface, load in a preset with
some bump to it so you can see some
“nurnage” (that's the industry's techni-
cal term for “neat-bumpy-detail”) as
you're flying down the shaft. (I wasn't
happy with any of the presets that
came with LightWave, so if you want to
use one of mine, load in
Surfaces\
GrungyCement.srf
.)
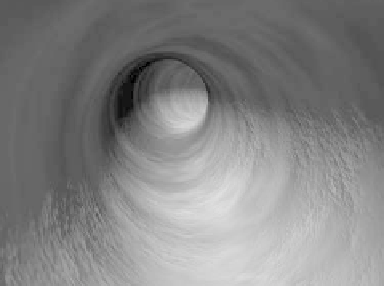
Figure 5-25: Just a quick F9 of the tunnel we just
made.
Spend some time lighting and surfacing
your tunnel scene. Render a movie and see
how things look.
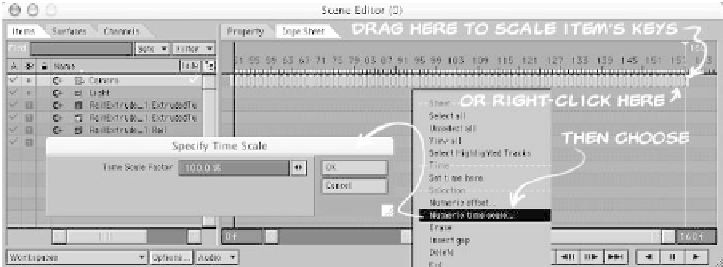
If things move too quickly or too slowly,
you may have to change the end frame of
your movie and enter the Scene Editor to
scale your keys.
Figure 5-26: You can scale the keyframes for objects in your scene using the Dope Sheet in
LightWave 8's Scene Editor. Click on the first keyframe for your camera (denoted by a green
bar), then, holding the <Shift> key, click on the last keyframe. You can drag the yellow bars on
either side of your selection to scale interactively or right-click and choose Numeric Time Scale
from the pop-up requester to scale your selection by a specific percentage. If you're unhappy
with the results, simply right-click again and select Undo.