Graphics Programs Reference
In-Depth Information
menu. (VIPER will remain active whether
its preview window is open or closed. To
shut down VIPER, deselect the Enable
VIPER button on the Render | Utilities
menu or in the Render Options panel.)
Note
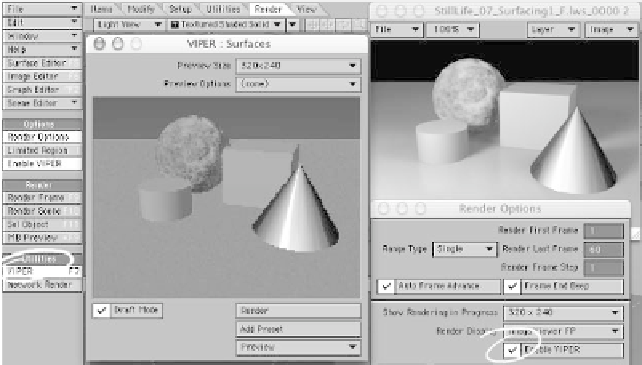
As you can tell from Figure 4-56, what you
see
in VIPER isn't always what you
get
in a
full-on render, but it's close enough to be a
huge time-saver.
Figure 4-55: In this render, the brass cone is good
enough to call it done. Save all objects.
With VIPER active, anytime you make a
change to a surface, you will see that
change reflected in the VIPER window as
soon as you let go of the mouse button.
You can even click on a surface in the
VIPER window, and that surface will be
selected in the Surface Editor window.
Step 5: VIPER
Anisotropy may look nifty, but it's not an
easy thing to understand. How do you
know what things will look like without
wating for render after render? VIPER
gives you a close approximation of what
your stuff will look like every time you
make an adjustment to your surfacing or
volumetric settings.
To preview your surfaces with VIPER,
you must fill its “info buffers” by rendering
a frame once VIPER has been activated.
VIPER can be activated by opening its pre-
view window from the Render | Utilities
Note
The Preview pop-up menu will let you build
a preview of textures that change over time
(surfaces and volumetrics). No geometry will
move, nor will the camera, but this is a great
way to check out surfaces that “crawl” over
an object (by assigning an envelope to their
scale and/or position) or volumetrics that
evolve through time.
Figure 4-56: The VIPER window.