Graphics Programs Reference
In-Depth Information
There's one more thing I want to do to this
before I call it “good enough,” and that is
sculpt the highlights a bit, getting Light-
Wave to figure out what they would look
like if the surface were to have the micro-
fine,
anisotropic
look of “brushed metal.” To
do that, we have to add a special
shader
,a
bit of code that LightWave uses in addition
to (or in some cases completely replacing)
its own rendering engine.
q. Under the Shaders tab in the Surface
Editor, choose
BDRF
(Bi-directional
Reflectance Distribution Function)
from the Add Shader pop-up menu.
r. Double-click on the newly added
shader to open its Properties window.
s. In the Layer 1 tab, set Specular Reflec-
tion 1 to
Antistrophic II
. Set its Color
to
255, 244, 187
.
t. Set its Specularity to
51%
and its
Glossiness to
42%
.
u. Its Anisotropy should be
23º
, and its
Direction should be
50º
.
v. Set its Mapping to
Cylindrical
and its
Axis to
Y
.
That will “shape” the
first
specular high-
light. Now we're going to add a
second
, very
subtle highlight to color the metal just a bit.
w.
Note
Now, I know those of you who really know
your science are probably saying, “Hey!
What gives? What we just did is
backward
—
surfaces are
more reflective
when seen from
a glancing angle than from head-on.”
And you're absolutely right.
However
, the moment we applied a
reflec-
tion map
, we moved away from “playing in
reality” and into “doing what it takes to
make something
look
good.” Often, there is
a vast gulf between reality and what we
viewers have come to be trained to
expect
.
If you've ever taken a close look at a gold
wedding band, you'll notice that it has some
seriously dark areas to its polished, reflective
surface. These aren't the areas facing you
because
you
are
reflected
in it! More often
than not, the dark areas are where the ring
begins to “turn away” from you.
What we've just done is apply a gradient
that forcibly makes that happen by eliminat-
ing the
reflection map
as the surface “turns
away” from us!
p.
On the Advanced tab of the Surface
Editor, set Color Highlights to
42%
.
This will blend 42% of the surface color
into the specular highlights. (“Metallic”
surfaces tend to have their hot spots
heavily influenced by their base colors.)
Under Layer 2, choose
Anisotropic
for
Specular Reflection 2. Its Color will be
103, 205, 73
.
x.
Specular should be
60%
, and Glossi-
ness should be
20%
.
y.
Anisotropy should be
42º
, and Direc-
tion should be
45º
.
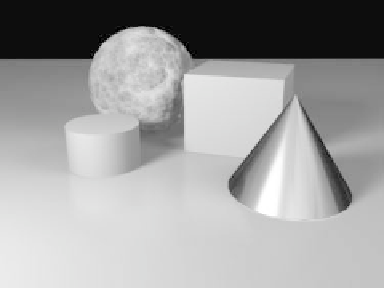
Figure 4-54: Now it's starting to look like metal.