Graphics Programs Reference
In-Depth Information
Note
Remember, you
can change your
viewport layout
to match my “2
Left, 1 Right”
layout through
Display Options
| Viewport
Layout.
Figure 4-14
b.
I've changed the light's color from 255,
255, 255 (white) to a bit of a bluish tint
and changed Light Type to
Spotlight
.
Something else I'd like us to do is bring
the Spotlight Soft Edge Angle up to
30.0º
, the same as the Spotlight Cone
Angle. This means that the spotlight
will fade in intensity evenly from
its center to its outer edge. (The
dashed line in the Light View viewport
responds when I change this input,
showing me where the light begins to
fade from its base intensity.)
c. As shown in Figure 4-16, increase
Light Intensity to
125%
, and click on
the
Shadows
tab so we can make the
objects feel like they're “sitting” on
something.
d. I'm not a fan of the sharp, hard-edged
shadows that ray tracing “casts” from
spotlights, so I'm not even going to go
there. We're going to start right off
with a Shadow Type of
Shadow Map
.
Shadow maps are quick to calculate,
they look good enough under most cir-
cumstances, and they let spots cast
soft-edged shadows.
How “good” a shadow map looks is directly
related to how large it is. It is, after all, only
a 2D “bitmap” created from the light's point
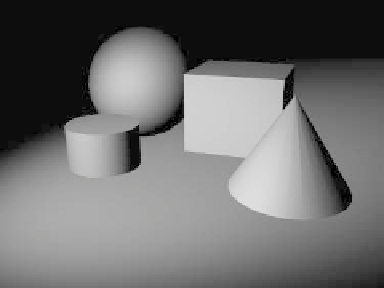
Figure 4-15: The still life looks a little more realistic
now, but it's too dark, and without shadows, the
objects look like they're “floating” over a nonde-
script plane.