Graphics Reference
In-Depth Information
Sculpting the terrain
Finally, the section for which we were waiting so eagerly, adding hills and digging
valleys. Preparing the terrain to get the 3D model should be our next logical step.
Why? Let's say that we skip this stage and add not only the 3D model, but also
additional interior and exterior 3D models. Then, if we start to sculpt the terrain, it
is more than certain that our scene will be messed up because the 3D models use the
terrain as the base and if that base is changed, we may need to tweak again the 3D
models present in the scene.
For some, the idea of sculpting the terrain looks like a difficult task, but actually is
easy, and the time it takes, depends on the approach we choose. And it may look
somehow confusing having some options to change the terrain, but these are ways
to accomplish different results. The options available to create the terrain are:
•
Lumion's tools
•
Modeling a 3D terrain
•
Importing a height map
•
Creating a 3D terrain with an external application
Unless we need something really specific, the Lumion native tools are good and
enough to produce good results. However, we are going to cover each solution and
this will help us understand when and where they can be used and applied. Let's
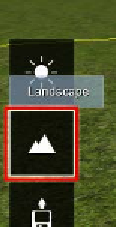
start with the native Lumion's tools found in the
Landscape
menu.
Lumion's sculpting tools
Lumion provides a complete set of tools that help us to sculpt and modify the
terrain. There are brushes to sculpt the terrain; we also have some predefined options
to create mountains, bodies of water, and on top of this, a wide variety of textures
and landscape types. All these features and tools are grouped in the
Landscape
menu. The
Landscape
menu can be found on the left-hand side under the
Weather
menu, as shown in the following screenshot: