Graphics Reference
In-Depth Information
The main goal of this chapter is to help you start the process of preparing a scene and
import the 3D model we prepared in
Chapter 1
,
Getting Ready for Lumion 3D
. A few
things that we will explore are the
Landscape
menu and the tools accessible to start
sculpting and adjusting the terrain with the help of a proxy model. A proxy model can
be a low geometry 3D model that works as a visual representation of the more detailed
3D model. The reason why we use this proxy model while making terrain changes is
because it helps the viewport's performance and makes it easier to tweak the terrain
without overwhelming Lumion with details at this stage, which is not necessary. Did
you know that you can use a terrain that was modeled with an external package or that
you can use height map and 3D terrains to replicate real-world locations?
Since we also need good light to see the 3D model, we will cover how to use the
Weather
menu and how to reproduce different times of the day, including a night-time
scene. In conclusion, to keep our scene organized, we will explore the out-of-sight
Layer
menu, which will help us to optimize the workflow and improve our efficiency. Let's
start by creating a new scene in Lumion.
Creating a scene in Lumion
A project encloses everything that we use to create the final image or video so that
we can say that a scene is the heart of our project because it is the basis to import a
3D model and start adding content until we reach the final stage where we get the
output, the result of hours of hard work. Let's see the different ways we can use to
create a scene in Lumion.
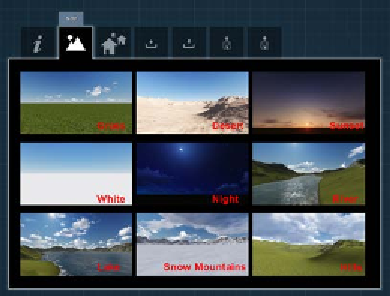
Using the nine scenes
You will notice that each and every time we launch Lumion, the opening menu that
appears is the
Files
menu with the
New
tab opened. The
New
tab is where we can
find nine scenes or presets to start a scene, as shown in the subsequent screenshot: