Graphics Reference
In-Depth Information
For this example, we will animate the same man walking and turning to
another street. Let's start by adding the Advanced move effect to the scene and
then clicking on the button with the pencil icon to start creating an animation. The
tools available are more complex than the ones in the previous effect; this is shown
in the following screenshot:
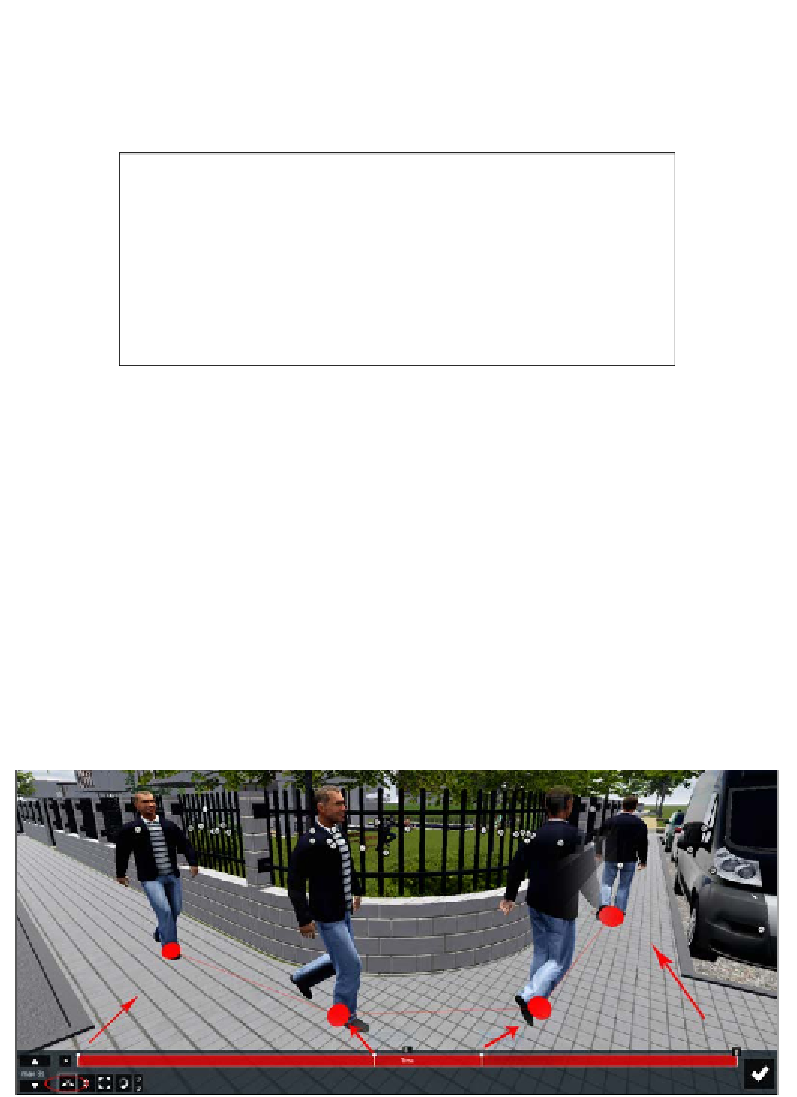
Instead of the
Start position
and
End position
buttons, we have a time bar that is
equivalent to the clip's length. In the example shown in the previous screenshot, the
length we have for the animation is 8 seconds, and we can scrub along the time bar
using the left mouse button to stipulate when the animation starts and ends. The
steps for this animation are as follows:
1. Move the time bar to the right time, and using the Move tool, set the first
key by slightly moving the 3D model.
2. Move the time bar to the end of the window and use the Move tool to set
the end key.
3. Then, between these two frames, create the keyframes needed to create a
smooth, curved path.
In the end, we want to create something like this: