Graphics Reference
In-Depth Information
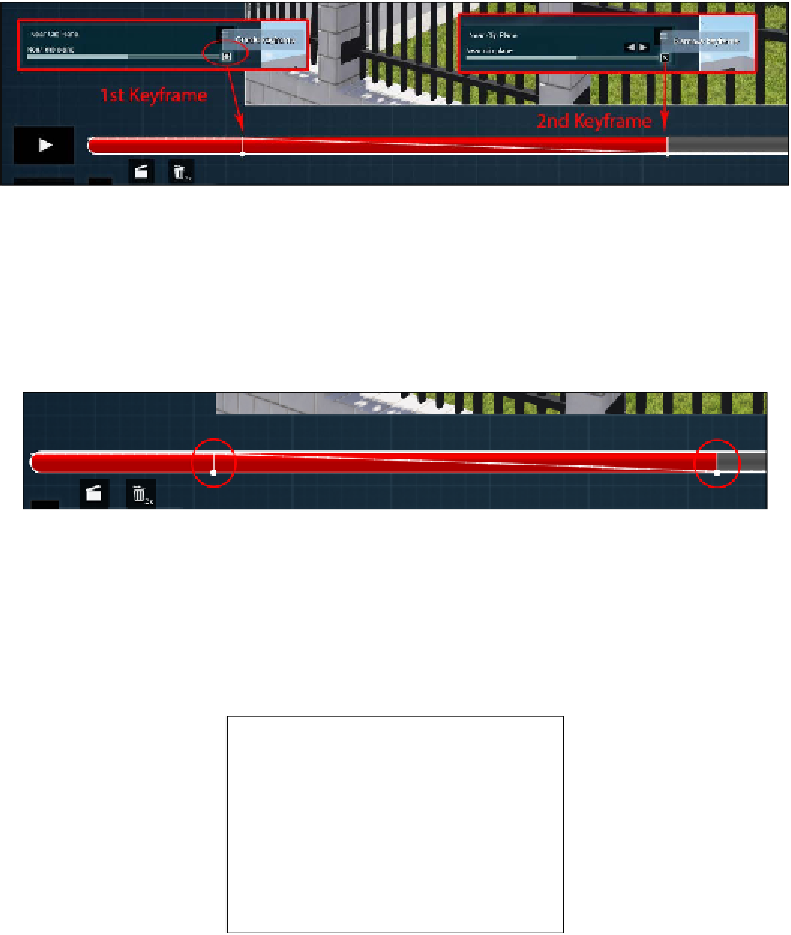
We will set the first keyframe and then adjust the value to specify the value for the
Near clip plane
setting, removing the wall in front of the camera. The second step
is to move the time bar to where the camera starts to move and create a second key
frame. After setting the second keyframe, we need to adjust the setting again to save
the new value. Can you see how two white lines were drawn in the time bar? Have a
look at the following screenshot, showing a closeup:
When you set more than one keyframe, Lumion generates the in-between frames,
resulting in a smooth change of that parameter over time, and this is called linear
interpolation. Animating an effect is easy, and we only need to keep in mind to
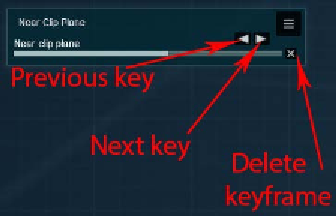
create the keyframe first and then adjust the value. However, what if we need
to delete a keyframe or tweak the ones created? Have a look at the following
screenshot that explains how we can perform these tasks:
As soon as we create a keyframe, these options become available, and they provide
all the control we need.
This overview provides enough information for us to move to more complex ways
to animate 3D models in Lumion.