Graphics Reference
In-Depth Information
At this instant, you might think that creating a storyboard is not such a bad idea after
all, because we are not dealing with a physical path, so we do not see anything that
will aid us in creating this camera path. How does it work then?
Creating a camera path
Let's start by opening the
Movie
mode and selecting an empty clip. As already
shown in the previous screenshot, three options appear, and in this instance, we
will select the Record button. When this option is selected, a new interface appears
where we can start taking photos to create the camera path. Do you see the preview
window with your scene displayed? This is your camera, and you can control it
using the same shortcuts used in the
Build
mode, but just as a reminder, here
are some of the most used shortcuts to navigate the Lumion camera:
•
WSAD
or arrow keys: These move the camera forward, backward, or to the
left or right
•
Q
: This moves the camera upward
•
E
: This moves the camera downward
• Spacebar +
WSAD
and
QE
: These slow down the camera speed
•
Shift
+
WSAD
and
QE
: These increase the camera speed
•
Shift
+ Spacebar +
WSAD
and
QE
: This is an option to choose a
high-speed camera
• The right mouse button: Press this and move it to look around
• The middle mouse button: Press this and move the mouse to pan
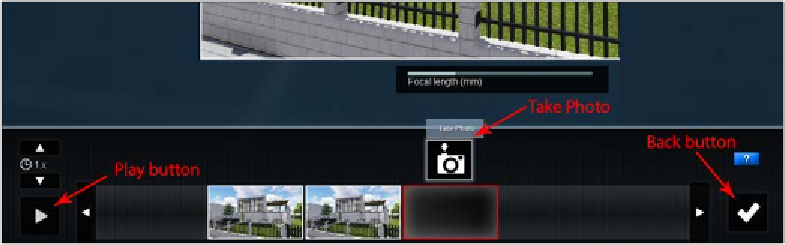
Now that we have placed the camera at the initial position, what is the next step?
Have a look at the following screenshot: