Graphics Reference
In-Depth Information
•
Condensing all the clips into a movie
: The advantage here is that we have
the opportunity to use effects with consistency throughout the movie, but it
doesn't allow us to have accurate control in specific sections of the movie
After adding these effects, we can start working with animation, which means we
have to use the specific effects found in Lumion. Once everything is prepared, we
can check and edit the clips and, finally, export the whole lot as a movie file or a
sequence of images.
While it might seem intricate and confusing, Lumion's
Movie
mode is very
intuitive, and in the upcoming sections, we will break down the entire process
into small steps. This will help us understand how each stage works and will
also help us fully master Lumion.
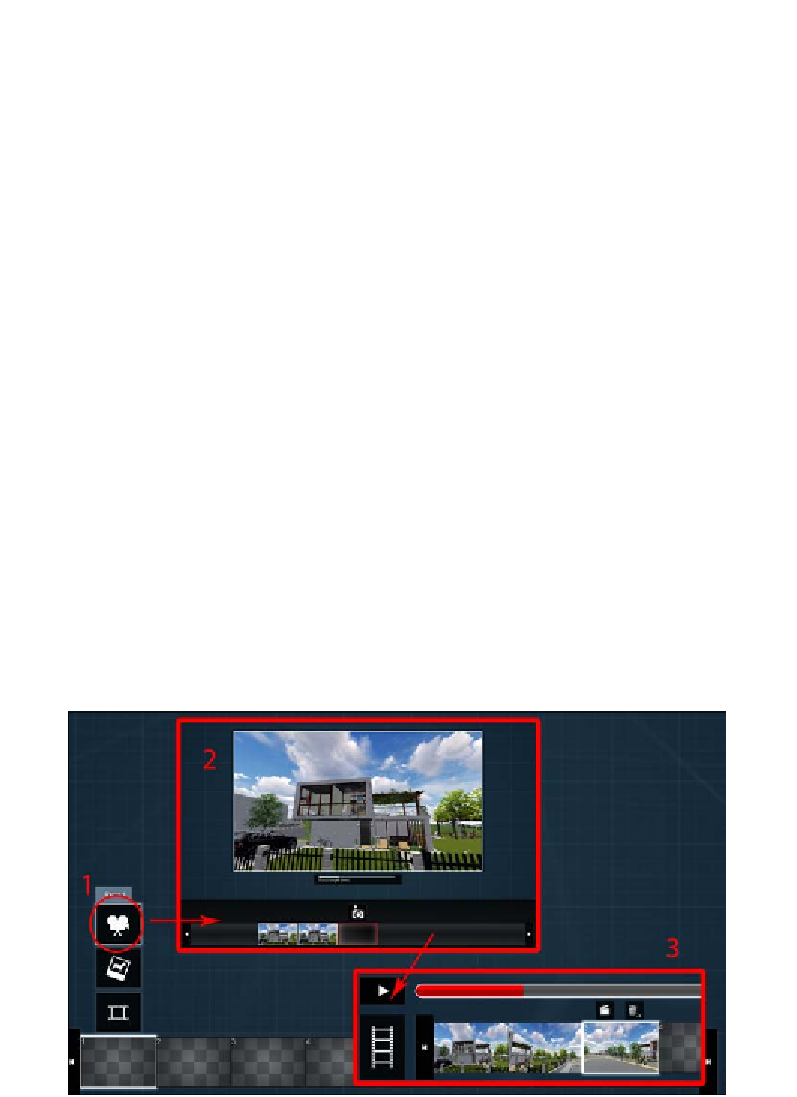
Step 1 - shoot the movie!
In real life, an essential element to create a movie is a camera. Likewise, in Lumion,
the camera is the most important element to capture the beautiful scene created,
and it is with this camera that we can start recording clips.
A clip is the smallest element that can be created to produce a
movie. A movie can have just one clip, but it is a good habit to
create several clips to improve the workflow.
The process is called creating a camera path, and what we need to do is set
multiple snapshots that define the different camera positions, as shown in the
following screenshot: