Game Development Reference
In-Depth Information
ScreenTransitionSlide.DOWN, false, Interpolation.bounceOut);
game.setScreen(new MenuScreen(game), transition);
}
It is highly recommended to take some time and play around with the constants for
UP
,
DOWN
,
LEFT
, and
RIGHT
, as well as to try different combinations of interpolation
algorithms either doing a slide-in or slide-out movement.
Creating a slice transition effect
We will now create a slice transition effect that we will use at the start of the game.
As you will see in a moment, we can also start a transition without a current screen
to another (first) one, which is exactly what we are going to do when the game starts.
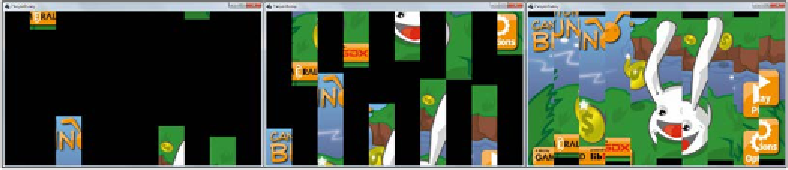
In this effect, the next screen is cut in a number of vertical slices. These slices are then
vertically moved off the screen to their respective starting positions. The starting
position alternates between the top and bottom edges. Finally, each slice is moved in
and over the current screen until it is entirely visible.
The following sequence of screenshots illustrates this effect:
Now, create a new file for the
ScreenTransitionSlice
class and add the
following code:
package com.packtpub.libgdx.canyonbunny.screens.transitions;
import com.badlogic.gdx.Gdx;
import com.badlogic.gdx.graphics.GL20;
import com.badlogic.gdx.graphics.Texture;
import com.badlogic.gdx.graphics.g2d.SpriteBatch;
import com.badlogic.gdx.math.Interpolation;
import com.badlogic.gdx.utils.Array;
public class ScreenTransitionSlice implements ScreenTransition {
public static final int UP = 1;
public static final int DOWN = 2;