Graphics Programs Reference
In-Depth Information
parency
(more about transparency in a minute). To pick a color other than white,
before
you
call up the New dialog box, use the background color square to pick the color you want, as
shown in
Figure 2-7
; then select Background Color from the New dialog box's Background
Contents menu.
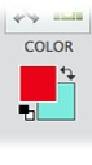
Figure 2-7. To choose a background color, just click the background color square in the Tools pan-
el (here, that's the aqua one) to bring up the Color Picker. Then select the color you want (the pro-
cess is explained in detail on page 253). The new color appears in the square, and the next time you
do something that involves using a background color, that's the shade you get.
Transparent is the most interesting option. To understand transparency and why it's such a
wonderful invention, you need to know that
every
digital image is either square or rectangu-
lar. Digital images
can't
be any other shape, but they can
appear
to be a different
shape—sunflowers, sailboats, or German Shepherds, for example. How? By placing an ob-
ject on a transparent background so that it looks like it was cut out and only its shape ap-
pears, as shown in
Figure 2-8
. The actual photo is still a rectangle, but if you placed it into
another image, you'd see only the shell and not the surrounding area, because the rest of the
photo is transparent.
To keep the clear areas transparent when you close the image, you need to save it in a format
that allows transparency. JPEGs, for instance, automatically fill transparent areas with solid
white, so they're not a good choice. TIFFs, PNGs, PDFs, and Photoshop (.psd) files, on the
other hand, let the transparent areas stay clear.
Save for Web Format and Quality Options
has
more about which formats allow transparency.