Graphics Programs Reference
In-Depth Information
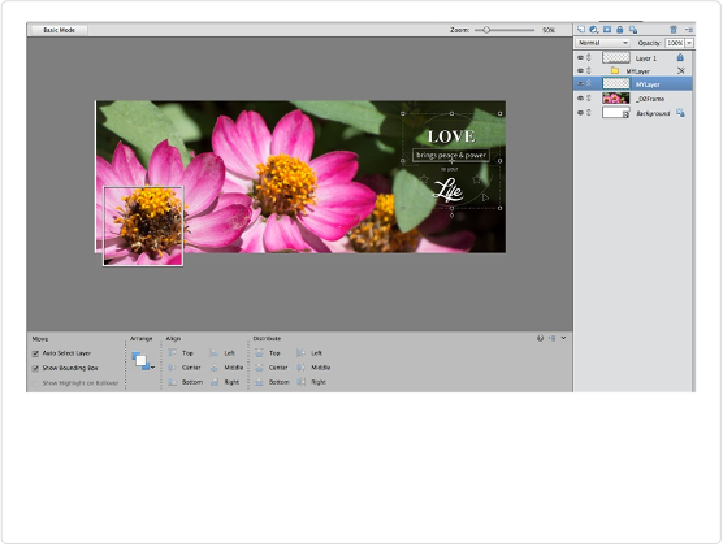
Figure 15-9. You can customize the templates that Adobe provides. Don't like this text
block? Just switch to the Move tool, select it, and then delete it. But keep a close eye on ex-
actly what you're deleting. In some cases, other parts of the template may be on the same
layer (like the border around the profile image), so it's helpful to make edits like this in Ad-
vanced mode (shown here), so you can keep track of the layers.
If you chose to upload both the profile image and the cover image, the window tells
you that the cover image has been successfully updated. Click Continue and Elements
launches your web browser and takes you to your Facebook page. You can drag your
photo to reposition it if you want, but unless you've changed your mind since you
started uploading, all you really need to do is click Save Changes.
If you decide you want to work on your project some more instead of uploading it,
just click the Save button at the bottom of the screen; then name your file and Ele-
ments saves it as a layered PSE file so you can go back to it again later.
If you decide you don't want to save your work
or
upload it, click the Close button
and tell Elements not to save your project.
5.
Switch back to Elements and click Continue to update your profile image
.
Elements takes you back to your web browser and your Facebook page. Click Done
Cropping to finish up.