Graphics Programs Reference
In-Depth Information
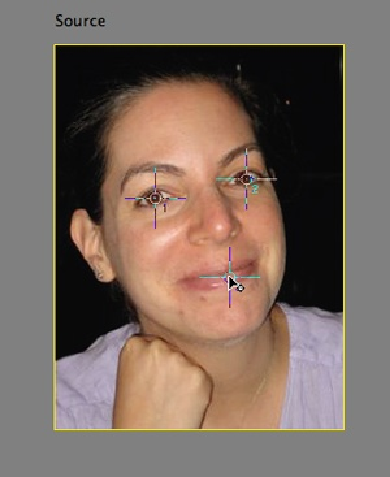
Figure 11-4. To tell Elements how to align your photos, drag one of these three crosshairs
over each eye and the mouth in each photo. (You need to move your mouse over the photo
to make the crosshairs appear.) If you look closely at the crosshairs, you'll see that each
one is numbered. Be sure to get the ones with the same numbers over the same features in
both photos. For instance, don't put Target 1 over the left eye in one photo and the right
eye in the other; put it over the left eye in both images.
Position the crosshairs over the eyes and mouth in each photo. (If you need help see-
ing what you're doing, there's a little toolbox on the left with your old friends the
Zoom and Hand tools, so you can reposition the photo for the best view.) Then click
the Align Photos button, and Elements adjusts the images so they're the same size and
sit at the same angle.
6.
Tell Elements what features to move from the source image to the final image
.
In the Photomerge Faces pan, click the Pencil tool and then, in the source photo, draw
over the area you want to move. In a few seconds, you should see the selected area
appear in the final photo. You only need to draw a quick line—don't try to color over