Graphics Programs Reference
In-Depth Information
Above the Levels dialog box's histogram is the Channel menu. If you click it, you can
choose to see a separate histogram for each individual color channel. You can adjust all three
channels at once with the RGB setting, or change each channel separately for maximum con-
trol.
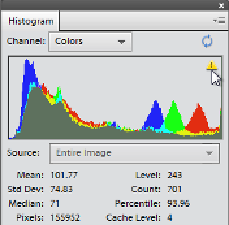
The histogram contains so much info about your photo that Adobe also makes it available in
Expert mode in its own panel (
Figure 7-12
), so you can always see it and use it to monitor
how you're changing the colors in an image. Once you get fluent in reading Histogramese,
you'll probably want to keep this panel around.
The histogram is just a graph, and you don't do anything to it directly. When you use Levels,
you simply use the histogram as a
guide
to help you tell Elements what to consider the black
and white points—that is, the darkest and lightest points—in your photo. (Remember, for
these settings, you're thinking in terms of brightness values, not shades of color.)
Figure 7-12. If you keep the histogram available by opening the Histogram panel (Window→Histo-
gram), you can always see what effect your changes are having on the photo's color distribution.
To get this nifty Technicolor view, choose Colors from the panel's Channel drop-down menu. To
update the histogram to reflect any changes you've made to the image, click the triangle in its up-
per right as shown here, or the circling arrows above it. If you're into statistics, there are a bunch
of them at the bottom of this panel, but if you're not a pro, you can safely ignore these numbers.
Once you've set these end points (you'll learn how in a moment), you can adjust the image's
midtones
—the tones in between that would appear gray in a black-and-white photo. If that
seems complicated, it's not—at least, not when you're actually doing it. Once you've made a
Levels adjustment, the next time you open the Levels dialog box, you'll see that your histo-