Graphics Programs Reference
In-Depth Information
you're adding or subtracting areas of your photo, use the red-overlay view instead so you can
see the objects in your photo as you paint over them. You can use the method described earli-
er to paint in either view.
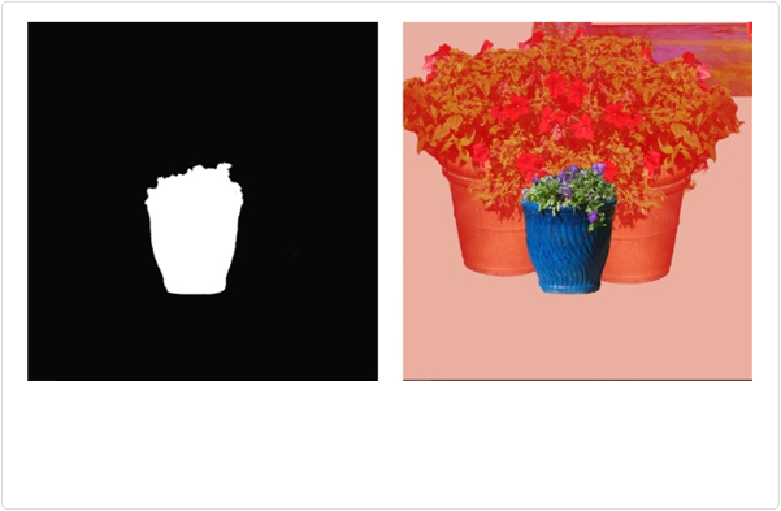
Figure 6-19. Here are two different views of the layer mask from Figure 6-18. Left: To see the
masked area in black and the unmasked area in white, Alt-click/Option-click the layer mask's
thumbnail in the Layers panel. Right: To see a red overlay atop the masked area, Alt+Shift-click/
Option-Shift-click the mask's thumbnail instead.
Layer masks are incredibly powerful, and this section covered only the very basics, but there
are literally
thousands
of different uses for them. For instance, you can paint the edges of a
photo with grunge brushes to create interesting borders, or apply a black-to-white gradient to
a layer mask to make the layer fade on one edge. There are entire topics written about mask-
ing techniques, and once you get started you'll want to explore more ways you can use this
powerful feature to help your creativity soar. To learn how to mask a particular object (like
hair, say), just Google “mask hair photoshop” and you'll get more tutorials than you could
work through in a lifetime. Katrin Eismann's
Photoshop Masking & Compositing
(New
Riders Press) is one of the most complete topics on the subject, although a fair amount of the
topic (like the parts about using the Pen tool) pertains only to Photoshop.