Graphics Programs Reference
In-Depth Information
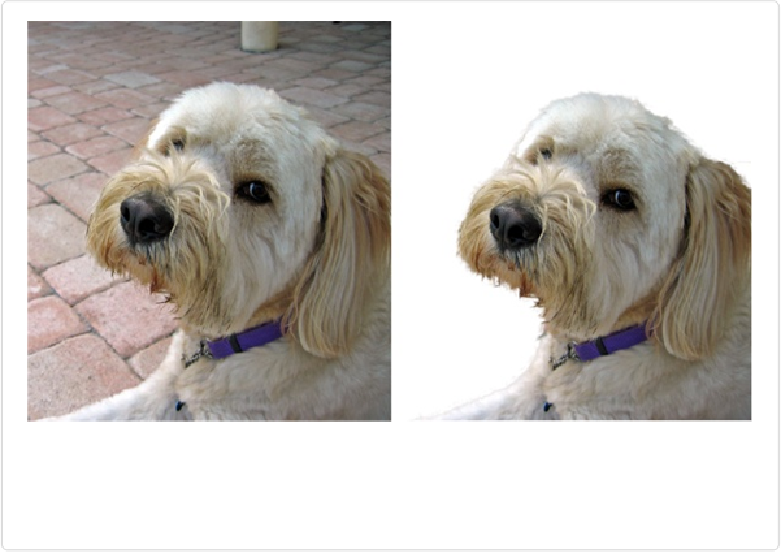
Figure 5-7. Left: Refine Edge is just the ticket for removing this puppy from its distracting back-
ground to use it in another image. Doing so would have been impossibly tough in early versions of
Elements, but the Refine Edge dialog box makes it a snap to select soft, furry edges. Right: Here's
the extracted dog against a plain background so you can see what a good job Refine Edge did.
You can call up the Refine Edge dialog box in a couple of different ways. One is to click the
Refine Edge button that appears in the Tool Options area when you have a Selection tool act-
ive. The other is by going to Select→Refine Edge whenever you have an active selection.
Either way, here's how to use the dialog box once it's open:
1.
Choose how you want to view your selection
.
If Elements plops the Refine Edge dialog box right on top of your image, start by
dragging the dialog box out of the way.
Once you can see your image, you can use the dialog box's controls to decide how to
view the selection. (Your many view options are explained after this step list.) Most of
the time, you can leave the options in the View Mode section the way Adobe set
them. There's a two-item toolbox to the left of this section that contains your old
friends the Hand and Zoom tools, which let you get a precise look at how you're
changing your selection.