Graphics Programs Reference
In-Depth Information
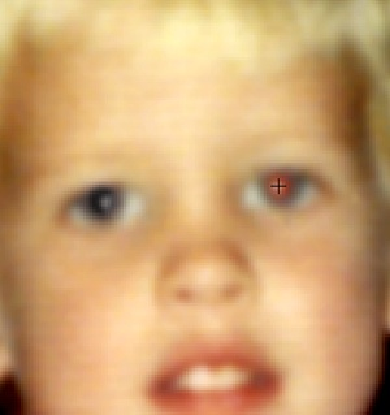
Figure 4-6. When using the Red Eye Removal tool, zoom in so you get a good look at the pupils.
Don't worry if your photo is so magnified that it loses definition—just make the red area large
enough so you can click right in its center. The eye on the left here has already been fixed. Notice
what a good job this tool does of keeping the highlights (called catch lights) in the eye that's been
treated.
TIP
You can also apply the Organizer's Auto Red Eye Fix in Quick Fix and Expert mode. In
either window, just press Ctrl+R/
⌘
-R or go to Enhance→Auto Red Eye Fix. (Alternat-
ively, you can activate the Red Eye Removal tool and then, in the Tool Options area, click
Auto Correct.) The only tradeoff to using Auto Red Eye Fix in the Editor is that you don't
automatically
get a version set like you do when using the tool in the Organizer, but you
can create a version set when you save your changes, as explained on
Saving Your Work
.
If you need to adjust how the Red Eye Removal tool works, the Tool Options area gives you
two controls, although 99 percent of the time you can ignore them:


